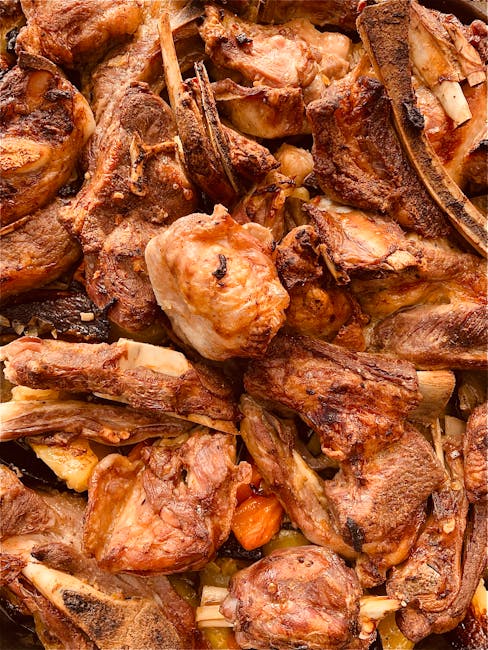
Do you ever wonder why your oven-cooked ribs don’t turn out as mouthwatering as those from your favorite barbecue joint? You’re not alone.
The secret to perfectly tender ribs lies in the temperature of your oven. It’s not just about setting your oven to a random number and hoping for the best. Knowing the ideal temperature can transform your ribs from ordinary to extraordinary.
Imagine serving ribs so juicy and tender that your friends and family can’t stop talking about them. Yes, it’s possible, and you don’t need to be a professional chef to achieve it. You just need to understand the science of heat and how it interacts with your meat. In this guide, you’ll discover the best temp for ribs in the oven, ensuring they are cooked to perfection every time. Stick around, because the tips and tricks we’re about to share could be the game-changer in your culinary repertoire. Get ready to make your kitchen the go-to spot for delicious ribs that rival those from the best barbecue spots.
Choosing The Right Temperature
Cooking ribs in the oven is a delicious way to get tender, juicy meat without the hassle of a grill. But the key to success lies in choosing the right temperature. The temperature you choose can make or break your ribs, affecting their texture and flavor. It’s a delicate balance between heat and patience, and understanding this can lead to the perfect rack of ribs every time.
Have you ever wondered why your ribs turn out dry or chewy? The secret is in the temperature. Cooking ribs at a low temperature for a longer time helps break down the tough connective tissues. This results in meat that falls off the bone.
When you aim for the right temperature, consider setting your oven to around 225°F (107°C). This low and slow method ensures the ribs are cooked evenly, retaining moisture throughout the process.
It’s tempting to crank up the heat to speed things up, but this can lead to burnt or tough ribs. Trust the process. Patience here pays off with succulent results.
Why Temperature Matters
Temperature isn’t just a number; it’s your guiding light to perfect ribs. Cooking at the right temperature means the fat melts slowly, enhancing flavor. Slow cooking at 225°F allows the meat’s natural juices to circulate, keeping it moist and flavorful.
High heat might sound appealing, but it can lead to quick moisture loss. Ever had ribs that tasted like cardboard? High temperatures might be the culprit. Stick to a lower heat and let the oven work its magic.
Personal Experience
I once tried cooking ribs at 300°F, thinking it would speed up dinner. Big mistake. They came out dry and lacked that mouth-watering tenderness I craved. After that, I switched to the slower method, and my family noticed the difference immediately.
Have you experimented with temperatures in your cooking? It’s an eye-opener when you see how it transforms your dishes. You might find yourself becoming a low-and-slow convert, just like I did.
Practical Tips
- Monitor with a meat thermometer to avoid overcooking.
- Preheat your oven for even cooking.
- Consider wrapping ribs in foil to lock in moisture.
- Use a drip tray to catch juices for added flavor.
Choosing the right temperature is a game-changer. It’s not just about following a recipe; it’s about understanding how heat influences the final taste and texture. Next time you cook ribs, give the low and slow method a try. You might find it becomes your new go-to technique for perfect ribs every time.
Low And Slow Method
The “Low and Slow Method” is a popular way to cook ribs in the oven. It involves using low heat over a long period. This method helps in making the ribs tender and flavorful. Cooking ribs this way allows the flavors to develop fully. It also ensures the meat stays juicy and succulent. Let’s explore the benefits and the ideal temperature range for this method.
Benefits Of Low Heat
Cooking ribs with low heat offers several benefits. It helps in breaking down tough fibers. This results in a tender texture that melts in your mouth. Low heat also allows the flavors to penetrate deeply. This makes each bite more delicious. The slow cooking process ensures even cooking. It reduces the risk of burning or drying out the ribs.
Ideal Temperature Range
The ideal temperature range for low and slow cooking is 225°F to 250°F. This range provides enough heat to cook the ribs thoroughly. It also helps to maintain moisture. At this temperature, ribs can cook for several hours. This allows the collagen in the meat to break down. The result is ribs that are tender and full of flavor.
Quick Cooking At Higher Temps
Cooking ribs in the oven at 375°F ensures tender and flavorful results. This temperature allows the meat to cook evenly. Achieve the perfect balance of juicy and well-cooked ribs by maintaining this heat level.
Cooking ribs in the oven can be a delightful experience. For those who crave speed, quick cooking at higher temperatures might be the way to go. This method offers a faster cooking time, allowing you to enjoy delicious ribs without a long wait. It can be a great option for busy evenings or when you’re in a hurry. Balancing speed and tenderness becomes crucial when using this method. Let’s explore how to make the most of higher temperatures for your ribs.When To Use Higher Temperatures
Higher temperatures work best for those with time constraints. They can deliver well-cooked ribs in less than two hours. It’s perfect for last-minute gatherings or sudden cravings. You won’t need to plan hours in advance. But it’s essential to monitor the ribs carefully. High heat can dry them out if left unattended.Balancing Speed And Tenderness
Achieving tenderness with speed requires precision. Start by preheating the oven to 400°F (204°C). Season the ribs generously to enhance flavor. Wrap them in foil to trap moisture. This helps maintain juiciness while cooking quickly. Check the ribs after 45 minutes. The meat should begin to pull back from the bone. If not, give them a bit more time. A final touch under the broiler adds a crispy finish. Always let the ribs rest before serving. This ensures the juices redistribute for optimal tenderness.Prepping The Ribs
Cooking ribs in the oven requires proper preparation. Prepping the ribs ensures tenderness and flavor. Two key steps are essential: removing the membrane and seasoning the ribs. These steps enhance the taste and texture.
Removing The Membrane
The membrane is a thin, tough layer. It covers the bone side of the ribs. Removing it makes the ribs more tender. Use a knife to loosen the edge of the membrane. Grip it with a paper towel for better hold. Pull it away from the ribs slowly. Sometimes it comes off easily. Other times, it requires a bit more effort. Don’t rush this step.
Seasoning Essentials
Seasoning adds flavor to ribs. Start with a dry rub. Choose ingredients like paprika, garlic powder, and brown sugar. Mix well in a bowl. Coat the ribs evenly with the rub. Let them sit for at least an hour. This allows flavors to penetrate the meat. For deeper flavor, refrigerate overnight. Salt enhances the taste, so don’t skip it. Pepper adds a subtle kick.
Using Foil Or A Baking Dish
Cooking ribs in the oven can be a delicious experience. Choosing between foil or a baking dish matters. Each method offers benefits for taste and texture.
Sealing In Moisture
Foil wraps ribs tightly. It traps steam and locks in moisture. This keeps ribs juicy and tender. A baking dish can also help. Use a lid to cover ribs. This helps retain moisture during cooking.
Avoiding Overcooking
Overcooking ruins ribs. Foil prevents direct heat. This helps control cooking. Ribs cook evenly without drying out. A baking dish distributes heat well. It ensures ribs cook slowly and steadily.
Monitoring Internal Temperature
Achieving juicy ribs in the oven requires the right temperature. Cook ribs at 225°F for tender results. Use a meat thermometer to monitor internal temperature, ensuring it reaches 190-203°F. This guarantees perfectly cooked ribs every time.
When cooking ribs in the oven, monitoring the internal temperature is crucial for achieving that perfect balance of tenderness and flavor. You might wonder why your ribs aren’t turning out as juicy as you hoped, even after following a recipe to the letter. The secret often lies in the internal temperature. Instead of guessing and checking, using the right tools and knowing the target temperature can make all the difference.Tools For Accuracy
To ensure your ribs reach the perfect internal temperature, invest in a reliable meat thermometer. Digital instant-read thermometers are highly recommended for their speed and precision. They allow you to check the temperature without the guesswork, preventing undercooked or overcooked ribs. Leave-in probe thermometers are also a great option. You can monitor the temperature throughout the cooking process without opening the oven door, which keeps the heat steady. This consistency is key to achieving the best results. For those who love tech gadgets, some thermometers connect to your smartphone, sending alerts when your ribs hit the desired temperature. This feature is perfect if you tend to get distracted while cooking.Target Internal Temps
The magic number for perfectly cooked ribs is between 190°F and 203°F. At this range, the collagen in the meat breaks down, resulting in juicy, fall-off-the-bone goodness. If you like your ribs with a bit more bite, aim for the lower end of this range. For super tender ribs, let them reach closer to 203°F. Keep a close eye as they approach these temperatures to avoid overcooking. Some cooks prefer to rest the ribs once they hit 190°F. This resting period allows the juices to redistribute, enhancing flavor and tenderness. Have you tried resting your ribs before serving? You might be surprised at the difference it makes.A meat thermometer and knowledge of target internal temperatures can transform your rib-cooking game. Try experimenting with these tips and notice how your ribs change from just okay to unforgettable. What will you do differently the next time you cook ribs?
Resting The Ribs
For tender ribs, bake at 275°F in the oven. This temperature ensures slow cooking, preserving juices. Resting ribs after cooking enhances flavor and tenderness.
Resting the ribs after they come out of the oven is a crucial step in achieving tender and flavorful results. Imagine pulling out a beautifully cooked rack of ribs, glistening with glaze and smelling divine. But before you dive in, giving them time to rest can make all the difference between a good meal and an unforgettable one.Importance Of Resting
Resting allows the juices to redistribute throughout the meat, making each bite more succulent. When ribs are too hot, cutting into them can cause the juices to escape, leaving you with dry meat. Have you ever been so eager to taste your creation, only to feel disappointed by the texture? Resting can help you avoid that letdown. Moreover, resting helps the meat finish cooking evenly. The residual heat continues to work its magic even outside of the oven. This means the center reaches the perfect temperature without the risk of drying out the edges.Optimal Resting Time
So, how long should you let your ribs rest? A good rule of thumb is to let them sit for about 10 to 15 minutes. This isn’t a long wait, but it’s enough to let the juices settle and ensure the flavors are locked in. Consider setting a timer as soon as you remove the ribs from the oven. This way, you can resist the temptation to cut into them too soon. Use this time to prepare any sides or set the table, making the wait feel productive rather than agonizing. You might be tempted to skip this step, especially when you’re hungry. But remember, patience in the kitchen often leads to tastier rewards. Have you tried resting your ribs before? What differences did you notice in the taste and texture?Saucing And Finishing Touches
For the best ribs in the oven, the ideal temperature is 300°F. Slow cooking ensures tender meat, while saucing adds flavor. Finish with a glaze or dry rub for the perfect touch.
Preparing ribs in the oven is an art that goes beyond simply cooking them. The final steps of saucing and adding finishing touches can elevate your ribs to a whole new level of deliciousness. This is where your creativity truly shines. The right sauce and application technique can transform your dish from ordinary to extraordinary, making your ribs the star of any meal.Selecting The Right Sauce
Choosing the perfect sauce for your ribs can be a delightful yet challenging task. You might prefer a sweet, tangy barbecue sauce, or perhaps a spicy glaze that packs a punch. Consider your audience and the mood of your meal. Are you aiming for a classic Southern feel or a unique twist on a traditional dish? Think about the flavors that complement the seasonings you’ve used. A honey mustard sauce, for instance, can beautifully highlight smoky ribs.Applying Sauce For Best Results
Once you’ve selected the ideal sauce, how you apply it is crucial. Timing is everything. Apply your sauce towards the end of cooking to avoid burning. This allows the sauce to caramelize perfectly without overpowering the meat’s natural flavor. Brush the sauce generously, but ensure it doesn’t drip excessively. This helps in achieving that perfect glaze without making a mess.Finishing Touches
The final touches can make all the difference. Consider adding a sprinkle of fresh herbs or a squeeze of citrus juice. These simple additions can enhance the aroma and flavor profile of your ribs, making them irresistible. You might also want to add a touch of sea salt or freshly ground pepper to finish. It’s these little details that can prompt your guests to ask for seconds. What unique finishing touch will you add to make your ribs unforgettable? By focusing on these aspects, you ensure your ribs are not only cooked to perfection but are also bursting with flavor and personality.Common Mistakes To Avoid
Cooking ribs in the oven can be tricky. Many home cooks make common mistakes that affect taste and texture. Understanding these pitfalls ensures perfect ribs every time. Let’s explore the common mistakes to avoid when cooking ribs in the oven.
Overcooking Dangers
Overcooking ribs is a frequent mistake. It leads to dry, tough meat. Ribs need a precise temperature for tenderness. Too high, and they lose moisture quickly. Monitor your oven temperature closely. Use a thermometer for accuracy. Aim for 225°F to 250°F. This range keeps ribs juicy and flavorful.
Skipping Rest Period
Many overlook the importance of resting ribs. After cooking, ribs need time to settle. This allows juices to redistribute. Cutting them too soon results in lost moisture. Wait at least 10 minutes before serving. This step ensures every bite is succulent. Your patience pays off with better taste and texture.
Frequently Asked Questions
Should Ribs Be 225 Or 250 In The Oven?
Cook ribs at 225°F for tender, juicy results. For a quicker option, use 250°F. Both temperatures work well.
Is It Better To Cook Ribs At 300 Or 350?
Cooking ribs at 300 degrees ensures tenderness and juiciness. Higher temperatures like 350 can dry them out. Slow cooking at 300 enhances flavor and texture, making it ideal for delicious ribs. Low and slow is key for achieving perfect ribs.
What’s The Best Temperature And Time To Cook Ribs?
Cook ribs at 225°F for 3-4 hours for tender results. Finish by grilling or broiling for 5-10 minutes to caramelize the sauce. Ensure the internal temperature reaches 190°F for perfect tenderness. Use a meat thermometer for accuracy. Enjoy juicy, flavorful ribs every time.
What Is The 3-3-3 Rule For Ribs?
The 3-3-3 rule for ribs involves smoking ribs for three hours, wrapping them in foil for another three hours, and then unwrapping and cooking them for a final three hours to ensure tender and flavorful results.
Conclusion
Cooking ribs in the oven requires the right temperature. For tender and juicy ribs, use a low and slow approach. Set your oven to 275°F for the best results. This temperature allows the meat to cook evenly. The flavors develop beautifully.
Remember to check for doneness. A fork should slide easily into the meat. Enjoy the perfect balance of taste and texture. With patience, your ribs will delight everyone. Keep experimenting with flavors and techniques. Your efforts will pay off in delicious bites.
Happy cooking!