Affiliate Disclosure: This post may contain affiliate links. If you purchase through links on our site, we may earn an affiliate commission at no extra cost to you.
Are you tired of your KitchenAid mixer not performing at its best? You might be missing out on some easy maintenance tips that can keep it running smoothly.
Your mixer is more than just an appliance; it’s your trusty partner in the kitchen, helping you whip up everything from creamy mashed potatoes to decadent cakes. Regular maintenance ensures it stays in top shape, saving you time and money on repairs.
Curious about how you can extend the life of your beloved mixer and keep it working like new? Keep reading to discover simple yet effective ways to maintain your KitchenAid mixer and enjoy its reliable performance for years to come.
Cleaning The Mixer
Proper care of your Kitchen Aid Mixer ensures long-lasting use. Regular cleaning prevents food residue buildup. A clean mixer enhances performance and keeps your kitchen hygienic.
Cleaning your KitchenAid mixer regularly is key to keeping it in top shape. A gleaming mixer not only looks great on your countertop but also ensures efficient performance for years. Imagine the delight of whipping up your favorite recipe in a spotless mixer—it’s a satisfying experience. So, let’s dive into the essentials of cleaning your KitchenAid mixer to maintain its charm and functionality.
Exterior Wiping
Begin by unplugging your mixer to ensure safety. Use a soft, damp cloth to gently wipe the exterior surfaces. Focus on areas where flour and batter tend to accumulate, like the crevices and knobs. Avoid using abrasive cleaners or scouring pads that might scratch the finish. A mild dish soap solution works wonders for stubborn spots. Remember, the more frequently you clean, the easier this task becomes.
Bowl And Attachments
Detach the bowl and attachments after each use. Wash them with warm soapy water to remove any food residue. Be sure to dry them thoroughly to prevent rust. Consider using a soft brush for intricate attachments like the whisk. Stainless steel bowls can often go in the dishwasher, but it’s wise to check your specific model’s guidelines.
Avoiding Water Damage
A common mistake is submerging the mixer in water. This can lead to serious damage. Instead, focus on spot cleaning with a damp cloth and avoid drenching any electrical components. When cleaning the head, ensure no water seeps into the motor housing. Always dry surfaces immediately to reduce moisture exposure. Ask yourself, is a few seconds of extra caution worth preventing costly repairs? By paying attention to these simple maintenance steps, you’re not just cleaning a mixer. You’re prolonging its life, ensuring every culinary creation is a success. How often do you clean your mixer, and have you noticed the difference it makes?
Lubricating The Motor
Your Kitchen Aid mixer works hard. Keeping the motor lubricated helps it perform well. Proper lubrication prevents wear and tear. It extends the mixer’s lifespan. Follow these steps for optimal maintenance.
Choosing The Right Grease
Using the right grease is crucial. Kitchen Aid recommends a food-grade grease. It is safe for food contact. This grease withstands high temperatures. Always check the mixer manual for grease type.
Frequency Of Lubrication
How often should you lubricate? Twice a year is ideal. Frequent use may require more lubrication. Less frequent use might need less. Regular checks ensure the motor stays smooth.
Steps For Proper Lubrication
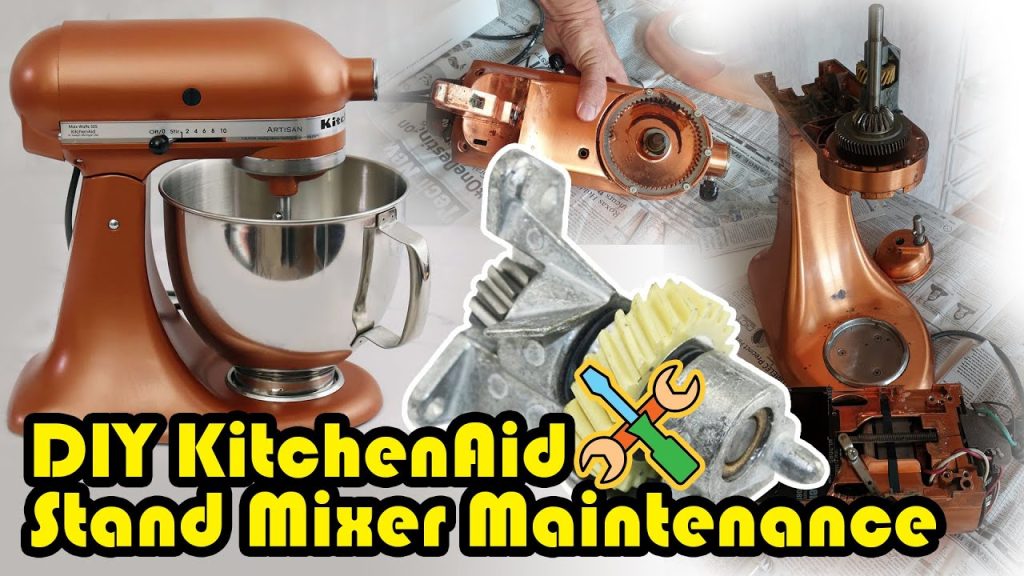
First, unplug the mixer. Safety is key. Next, remove the mixer cover. Locate the motor and gears. Clean any old grease from the motor. Apply new grease evenly. Use a spatula for precision. Reassemble the mixer cover. Test the mixer at low speed. Ensure it runs smoothly.
Inspecting The Cord
Regularly check the cord of your Kitchen Aid mixer for signs of wear or damage. Look for fraying or exposed wires to ensure safety and optimal performance. Addressing any cord issues promptly can prevent electrical hazards and extend the life of your appliance.
Maintaining your KitchenAid mixer is essential to ensure it lasts for years. One crucial aspect is inspecting the cord. A damaged or worn-out cord can be hazardous and affect your mixer’s performance. Let’s dive into how you can check your mixer’s cord and keep it in top shape.
Checking For Wear And Tear
Start by examining the entire length of the cord. Look closely for any signs of fraying or cracks in the insulation. If you spot any damage, it might be time to consider replacing the cord to prevent electrical hazards. Gently bend the cord and observe if it retains its flexibility. A stiff or brittle cord can be a warning sign that it’s deteriorating. Have you ever found your mixer not working suddenly? It could be a faulty cord causing the issue.
Safe Storage Practices
How you store your mixer can significantly affect the cord’s lifespan. Ensure the cord is not tightly wound or pinched, as this can lead to damage over time. Instead, loosely coil the cord and secure it with a twist tie or rubber band. Consider storing your mixer in a dry place, away from direct sunlight. Extreme temperatures can affect the cord’s material, leading to wear and tear. Have you considered how the environment can impact your kitchen appliances? By taking these simple steps, you can avoid potential hazards and ensure your KitchenAid mixer remains a reliable kitchen companion. Inspecting and caring for the cord is a small but significant part of maintenance. Are you ready to give your mixer the attention it deserves?
Adjusting The Beater Height
Your KitchenAid mixer is a trusty companion in your culinary adventures, but keeping it in top shape requires some attention. One vital maintenance task is adjusting the beater height. Proper alignment ensures your ingredients mix evenly, preventing awkward lumps or unmixed patches. You’ll be amazed at the difference a small adjustment can make in your baking results. Let’s dive into how you can spot the signs of misalignment and fix them like a pro!
Signs Of Misalignment
Ever noticed your mixer leaving residue at the bottom of the bowl? This could be a tell-tale sign of a misaligned beater. Sometimes you may hear unusual clanking or scraping sounds during mixing. These noises are not normal! They often indicate that your beater is too close or too far from the bowl.
Another indicator is unevenly mixed batter or dough. If your cake mix has stubborn lumps or your dough has dry patches, it’s time to check the beater height. Ensuring proper alignment can save you from these kitchen mishaps.
Tools Needed For Adjustment
Adjusting the beater height is straightforward, but you’ll need a few basic tools. First, grab a flathead screwdriver. It’s your essential tool for this task. Also, keep a small coin handy. It might sound odd, but it’s perfect for testing the adjustment.
Finally, have your instruction manual within reach. Though adjustments are simple, a quick glance at the manual can confirm you’re following the correct steps for your specific model.
Step-by-step Guide
- Unplug your mixer for safety. Never skip this step to avoid any accidents.
- Remove the mixing bowl and the beater. This gives you clear access to the adjustment screw.
- Locate the screw at the base of the mixer head. It’s usually visible once the bowl is removed.
- Use your flathead screwdriver to turn the screw clockwise or counterclockwise. Adjust it slightly in the necessary direction. Small adjustments make a big difference!
- Test the beater height by placing a coin in the bowl. Attach the beater and lower the mixer head. The beater should just graze the coin, without pushing it.
- Fine-tune if needed. Repeat the test until the beater height is just right.
- Reattach the bowl and beater. Plug in your mixer and rejoice in your perfectly aligned setup!
Adjusting the beater height is a small task with huge benefits. Imagine your cakes rising evenly or your bread dough mixing seamlessly. Why not ensure your KitchenAid mixer delivers the best results every time? Your baking creations deserve it!
Tightening The Bowl-lift Mechanism
Kitchen Aid mixers are beloved for their durability and performance. Regular maintenance ensures they work efficiently. One crucial aspect is tightening the bowl-lift mechanism. This keeps your mixer stable during intense mixing sessions. A well-adjusted mechanism prevents wobbling and improves mixing precision. Let’s delve into how to identify loose components and apply adjustment techniques to keep your mixer in top shape.
Identifying Loose Components
Loose components often cause bowl instability. First, check the bowl-lift lever. It should move smoothly without excessive play. Next, inspect the bowl-lift arms. Ensure they are securely attached to the base. Finally, examine the bolts and screws. These should be tight and free from rust.
Adjustment Techniques
Start by tightening any loose screws. Use a screwdriver that fits perfectly. If the bowl still feels loose, adjust the lever tension. This involves turning the adjustment screws located at the base. Turn them clockwise for a tighter fit. Ensure the bowl sits firmly on the arms. Test the adjustments with a gentle shake. There should be no wobble. Repeat the process if necessary.
Maintaining Attachments
Regularly cleaning Kitchen Aid mixer attachments ensures optimal performance and longevity. Detach and wash thoroughly to prevent food buildup. Dry completely before reassembling to avoid rust.
Maintaining your KitchenAid mixer attachments ensures their longevity and optimal performance. Attachments can transform your mixer into a versatile kitchen tool, but they require care to stay in top shape. Let’s dive into some practical tips to maintain these handy accessories.
Storage Tips
Proper storage of attachments is crucial. Always store your attachments in a dry place to prevent rust and damage. Consider dedicating a drawer or a small bin specifically for your mixer attachments. This way, you avoid misplacing them and keep them organized. If space is tight, try using a pegboard or hooks inside a cabinet door. This keeps them accessible and off your countertop.
Cleaning Specifics
Cleaning each attachment properly keeps them hygienic and functional. Always check if the attachment is dishwasher-safe before placing it in the dishwasher. For those that require hand washing, use warm soapy water and a soft brush to clean any crevices. This removes food particles without scratching the surface. Dry your attachments thoroughly before storing them. Moisture can lead to rust, particularly in metal parts, impacting their performance. Have you ever cleaned an attachment and noticed leftover residue? A simple trick is to soak it in a mix of vinegar and water. This helps dissolve stubborn bits, leaving your attachment spotless. Maintaining your KitchenAid mixer attachments doesn’t have to be a chore. With these simple tips, you can keep them in pristine condition, ready for your next culinary adventure. What other clever storage or cleaning hacks do you use in your kitchen? Share your thoughts!
Preventive Maintenance
Regular care for your Kitchen Aid mixer ensures long-lasting performance and efficiency. Clean the attachments after each use. Regularly check and tighten loose screws for smooth operation.
Maintaining your Kitchen Aid mixer is essential for keeping it in peak condition and ensuring it serves you well for years to come. Preventive maintenance not only helps in avoiding unexpected breakdowns but also ensures that your mixer performs at its best every time you use it. Think of it as giving your trusty kitchen companion a little TLC. After all, who wants to be in the middle of baking a cake only to find their mixer isn’t up for the job?
Regular Use Checks
Each time you use your Kitchen Aid mixer, take a moment to check a few basics. Start by ensuring that all attachments are securely fastened. Loose attachments can cause the mixer to wobble, which may lead to wear and tear over time. After every use, wipe down the body of the mixer with a damp cloth. This simple step prevents the build-up of dust and food particles that could interfere with the moving parts. Consistent cleaning keeps the mixer looking new and functioning smoothly. Listen for unusual noises during operation. Any grinding or screeching sounds may indicate a problem that needs attention. Catching issues early can save you from costly repairs and downtime.
Scheduling Professional Service
Even with regular checks, your mixer may benefit from professional servicing. Just like your car, it needs a thorough check-up every so often. Consider scheduling a professional service at least once a year to keep it in top shape. A technician can open up your mixer and inspect areas that you might not be able to see. They can lubricate moving parts, tighten loose screws, and replace worn-out gears. This ensures your mixer runs smoothly and quietly. Think of professional servicing as an investment. It extends the lifespan of your mixer and maintains its performance. Wouldn’t it be reassuring to know that your mixer is always ready to tackle any recipe you throw at it? Taking these steps towards preventive maintenance ensures that your Kitchen Aid mixer stays reliable and efficient. How do you maintain your kitchen gadgets? Share your tips and experiences in the comments below!
Troubleshooting Common Issues
Regular Kitchen Aid Mixer maintenance prevents common issues. Clean attachments after each use. Check for loose parts periodically.
Your Kitchen Aid mixer is your trusty sidekick in the kitchen, effortlessly whipping up everything from bread dough to cake batter. However, like any hardworking appliance, it might encounter a hiccup or two. Troubleshooting common issues can save you time and money, ensuring your mixer remains in top-notch condition. Let’s dive into some typical problems and how you can tackle them head-on.
Mixer Not Starting
There’s nothing more frustrating than a mixer that refuses to start. First, check the power source. Is the mixer plugged in properly? A loose connection can easily be overlooked. Next, examine the power cord for any visible damage. A frayed or broken cord may prevent power from reaching the mixer. Sometimes, the issue might be as simple as a tripped circuit breaker. Ensure your electrical circuit is functioning properly.
Unusual Noises
A mixer making strange noises can be quite alarming. Start by removing any attachments and running the mixer on its own. Listen carefully—are the sounds still there? If not, the attachment might be the culprit. Check that all parts are securely fastened. Loose parts can cause rattling or grinding noises.
Overheating Concerns
Your mixer should not feel hot to the touch. If it does, you might be overloading it. Try mixing smaller batches to see if the issue persists. Give your mixer some downtime between uses. Continuous operation can lead to overheating. Make sure the vents are not blocked. Proper airflow is essential for keeping the motor cool. Have you encountered these issues before? Understanding these common problems can help extend the life of your Kitchen Aid mixer. With a little maintenance and attention, you can keep your appliance running smoothly for years to come.
Frequently Asked Questions
Does My Kitchenaid Mixer Need To Be Oiled?
Your KitchenAid mixer does not require oiling. Regular maintenance includes cleaning and checking for any worn-out parts. Keep the mixer clean and ensure all components are properly assembled for optimal performance. Consult the user manual for specific care instructions.
How To Get Your Kitchenaid Mixer Serviced?
Contact KitchenAid’s customer service for authorized service centers. Visit their website for repair options and warranty details.
How Do I Clean The Inside Of My Kitchenaid Mixer?
Unplug the mixer and remove attachments. Use a damp cloth to wipe the bowl and mixer head. Dry thoroughly with a soft towel. Avoid using abrasive cleaners. Ensure all parts are dry before reassembling.
What Is The Average Lifespan Of A Kitchenaid Mixer?
A KitchenAid mixer typically lasts 15 years. With proper care and maintenance, it can last up to 30 years. Regular cleaning and using the mixer according to guidelines extend its lifespan. Investing in quality parts and timely repairs ensures durability and long-term performance for your KitchenAid mixer.
Conclusion
Caring for your Kitchen Aid mixer ensures it lasts longer. Regular cleaning keeps it efficient and ready for use. Inspect attachments for any wear or damage. Replacing them when needed maintains optimal performance. Lubricate moving parts occasionally to avoid friction.
Store your mixer in a dry place to prevent rust. Follow these maintenance tips for a reliable kitchen companion. Your mixer will thank you with years of flawless service. Enjoy smooth mixing and delicious results every time. Keep your mixer in top shape, and it will serve you well.
Happy baking!