Affiliate Disclosure: This post may contain affiliate links. If you purchase through links on our site, we may earn an affiliate commission at no extra cost to you.
Are you ready to take your turkey cooking skills to the next level? Imagine serving a perfectly cooked turkey that’s juicy, flavorful, and the star of your holiday table.
If you’ve ever felt overwhelmed by the thought of roasting a turkey, you’re in the right place. The secret to a stress-free and mouth-watering turkey is right at your fingertips: an electric roaster. With this handy kitchen gadget, you can achieve culinary perfection without the hassle of constant monitoring.
As you follow our best recipe for cooking a turkey in an electric roaster, you’ll discover how easy it is to impress your family and friends with your newfound turkey expertise. Ready to wow your guests with a feast they’ll remember? Let’s dive in.
Choosing The Right Turkey
Choosing the right turkey sets the stage for a delicious meal. Not all turkeys are the same. Knowing what to look for can make a big difference.
Fresh Vs. Frozen
Fresh turkeys bring rich flavors to your table. They don’t need thawing. They can be cooked right away. But, they might cost more. Frozen turkeys are budget-friendly. They need time to thaw. Plan ahead if choosing frozen.
Size And Weight Considerations
The right size turkey depends on your guest count. A small turkey suits a small gathering. Large turkeys fit big parties. Calculate one pound per person. This ensures everyone has enough to eat. Make sure it fits your electric roaster. Always check dimensions before buying.
Preparing The Turkey
Preparing a turkey for an electric roaster demands attention and care. A well-prepared turkey ensures even cooking and a juicy meal. Follow these steps to get your turkey ready for roasting.
Thawing Techniques
Thawing the turkey is the first essential step. Always thaw in the refrigerator. Allow 24 hours for every 4-5 pounds of turkey. This method keeps the turkey at a safe temperature. For faster thawing, use cold water. Submerge the turkey in cold water. Change the water every 30 minutes. Expect 30 minutes per pound for this method.
Cleaning And Pat Dry
After thawing, remove the giblets and neck. Rinse the turkey inside and out with cold water. Make sure to wash away any residue. Pat the turkey dry with paper towels. Drying helps the skin crisp up while cooking. A dry surface allows for even browning.
Flavorful Marinades And Rubs
Discover the secret to a delicious turkey with flavorful marinades and rubs. Enhance the taste using an electric roaster. Simple steps ensure juicy, mouthwatering results for your holiday feast.
Flavorful marinades and rubs transform turkey into a delicious centerpiece. The right blend can enhance the taste, making each bite delightful. Two standout options are the classic herb blend and the citrus and spice infusion.
Classic Herb Blend
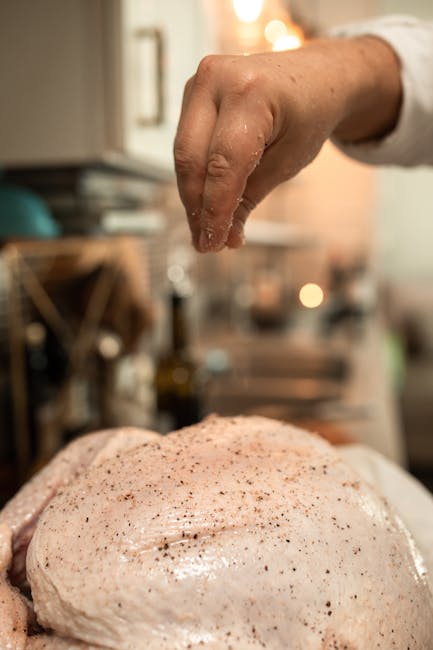
The classic herb blend brings out the natural taste. This marinade uses rosemary, thyme, and sage. These herbs pair well with turkey, providing a savory aroma. Olive oil and garlic add depth to the flavor. Rub the mixture under the turkey skin for maximum taste. Allow the turkey to marinate for several hours. This ensures the flavors penetrate the meat. A classic herb blend guarantees a delicious result.
Citrus And Spice Infusion
Citrus and spice infusion adds a zesty twist. Orange and lemon zest brighten the turkey’s taste. Combine with garlic, paprika, and cumin for warmth. This mix offers a refreshing yet spicy profile. Apply generously to the turkey, letting it sit overnight. The citrus juices tenderize the meat, enhancing the flavor. This combination results in a juicy, flavorful turkey. Perfect for those seeking a unique taste experience.
Prepping The Electric Roaster
Cooking a turkey in an electric roaster can be a breeze. Prepping the electric roaster is a crucial step in achieving a succulent turkey. This preparation ensures even cooking and enhances flavor. Follow these simple steps to get your roaster ready.
Temperature Settings
Start by setting the correct temperature. Most turkeys require around 325°F. This ensures the turkey cooks evenly without drying out. Double-check your roaster’s manual for specific settings. Each model might vary slightly. Keep an eye on the turkey as it roasts. Adjust the temperature if necessary.
Roaster Accessories
Accessories can make a big difference. Use a roasting rack to elevate the turkey. This allows heat to circulate and cook the bird evenly. Some roasters come with a lid. Use it to trap heat and keep the turkey moist. A thermometer is essential. Ensure the turkey reaches the right internal temperature. These tools help make the cooking process efficient.
Cooking The Turkey
Discover the best way to cook a turkey using an electric roaster for juicy, flavorful results. This method ensures even cooking and keeps the meat tender. Perfect for holiday feasts and family gatherings.
Cooking a turkey in an electric roaster offers simplicity. It ensures even cooking and juicy results. Electric roasters are a convenient option for holiday feasts. They free up oven space for side dishes. Let’s dive into the best techniques to achieve a perfectly cooked turkey.
Time And Temperature Guidelines
Set your electric roaster to 325°F. This temperature cooks the turkey evenly. The cooking time depends on the turkey’s weight. A 12-14 pound turkey takes about 3-4 hours. Use a meat thermometer to check the internal temperature. The thickest part of the thigh should reach 165°F.
Monitoring Progress
Regularly check the turkey’s progress. Open the lid briefly to prevent heat loss. Basting isn’t necessary in an electric roaster. It retains moisture well. If the turkey browns too quickly, cover it with foil. This prevents over-browning and ensures tender meat.
Ensuring Moisture And Flavor
Cooking a turkey in an electric roaster can keep it juicy. The right techniques ensure moisture and flavor. A few simple steps elevate your turkey’s taste.
Basting Techniques
Basting helps keep the turkey moist. Use a baster or a spoon. Pour drippings over the turkey every 30 minutes. This keeps the skin crispy and the meat juicy. Be gentle to not disturb the skin. Basting adds a rich flavor to the turkey.
Adding Broth Or Wine
Enhance your turkey’s flavor by adding liquid. Choose broth or wine. Pour it into the roaster before cooking. This keeps the turkey moist from the inside. The liquid steams and flavors the meat as it cooks. Broth gives a savory taste. Wine adds a hint of richness.
Checking For Doneness
Ensuring your turkey is perfectly cooked in an electric roaster involves checking its internal temperature. A meat thermometer inserted into the thickest part of the breast should read 165°F. Juices running clear and no pink color in the meat signal doneness.
Checking for doneness is crucial when cooking turkey in an electric roaster. Properly cooked turkey ensures safety and enhances flavor. Overcooked turkey becomes dry, while undercooked turkey poses health risks. This section will guide you to check if your turkey is ready.
Using A Meat Thermometer
A meat thermometer is essential for accuracy. Insert it into the thickest part of the turkey. Avoid touching bones as they skew readings. The ideal temperature is 165°F for safety. Check different parts of the turkey for consistency. This ensures even cooking throughout.
Visual Cues
Observe the turkey’s skin for a golden-brown color. Juices should run clear, not pink. Clear juices indicate proper cooking. Pierce the turkey with a fork to check. If the juices flow clear, it’s done. The legs should move easily at the joints. This shows the turkey is cooked thoroughly. Using both methods guarantees a perfectly cooked turkey. Enjoy your delicious and safe meal!
Resting And Carving
Discover the best turkey recipe using an electric roaster. Resting ensures juicy meat, while proper carving enhances presentation and flavor. Perfect for any occasion.
Cooking a turkey in an electric roaster brings convenience and flavor. Resting and carving are crucial steps that enhance your turkey’s taste and texture. Proper resting allows the juices to redistribute. Carving ensures each slice is tender and delicious. Let’s dive into these essential processes.
Importance Of Resting
Resting the turkey is vital. It lets the juices settle. This prevents dry meat. A turkey should rest for at least 20 minutes. Cover it loosely with foil. This keeps it warm. Resting also makes carving easier. Juices stay inside the meat, adding flavor. Skipping this step leads to less tasty turkey.
Carving Tips
Carving a turkey can be simple. Use a sharp knife. Start with the legs. Slice them away from the body. Next, tackle the wings. Cut them off smoothly. Then, carve the breast. Slice against the grain. This keeps the meat tender. Arrange the pieces on a platter. Serve with confidence. Your turkey will impress.
Serving Suggestions
Cooking a turkey in an electric roaster can be a delightful experience. After achieving the perfect roast, knowing how to serve it makes a big difference. Pair your juicy turkey with tasty side dishes and present it beautifully. These tips will elevate your meal.
Side Dish Pairings
Complement your turkey with classic sides like mashed potatoes. Creamy potatoes enhance the savory flavor of the turkey. Green beans add color and nutrition. Their freshness balances the meal. Cranberry sauce is a must for a sweet touch. It pairs perfectly with turkey’s rich taste.
Stuffing is another traditional side. Choose a recipe with herbs and spices. It adds depth to your meal. Try roasted carrots for a bit of sweetness. Their vibrant color brightens the table. For a lighter option, consider a mixed green salad. It offers a refreshing contrast.
Presentation Ideas
Presentation makes your turkey feast more appealing. Arrange the turkey slices neatly on a platter. Garnish with fresh herbs like rosemary or thyme. They add a pop of green and aroma. Place side dishes in attractive bowls. Use contrasting colors to catch the eye.
A beautiful table setup enhances the meal. Use elegant tableware and cloth napkins. Consider seasonal decorations like autumn leaves or small pumpkins. They add a festive touch. Serve sauces in small dishes for easy access. This keeps the table tidy and organized.
Frequently Asked Questions
Do You Put Water In An Electric Roaster When Cooking A Turkey?
No, you don’t need to add water when cooking a turkey in an electric roaster. The turkey releases natural juices during roasting, which keeps it moist. Adding water can dilute flavors and interfere with the roasting process. For best results, focus on seasoning and proper cooking time.
Is It Better To Roast A Turkey At 325 Or 350?
Roasting a turkey at 325°F ensures even cooking and juicier meat. At 350°F, the turkey cooks faster, potentially drying out. For best results, use 325°F for a balanced approach, avoiding dryness and achieving a perfectly roasted turkey with a golden skin.
Adjust based on turkey size and oven performance.
What Do You Put In The Bottom Of A Roasting Pan For A Turkey?
Place a rack or chopped vegetables like carrots, onions, and celery in the bottom of a roasting pan for a turkey. This elevates the bird, ensuring even cooking and flavorful drippings. Adding herbs and garlic enhances the aroma and taste.
Is It Better To Put Turkey In The Oven Or Electric Roaster?
Using an electric roaster can save oven space and cook turkey evenly. It retains moisture, ensuring juicy meat. An oven provides a traditional roasting experience, ideal for crispy skin. Choose based on preference and kitchen space. Both methods can deliver delicious results if cooked properly.
Conclusion
Cooking turkey in an electric roaster is simple and tasty. Enjoy tender meat with less hassle. This method saves time and effort. Perfect for holiday feasts and family dinners. Your turkey will impress guests every time. Experiment with spices and herbs for extra flavor.
Follow the steps closely for best results. Electric roasters cook evenly and efficiently. Your turkey will be juicy and delicious. Try this recipe soon and share the joy. Turkey nights will become a tradition. Happy cooking and enjoy your meal!