Affiliate Disclosure: This post may contain affiliate links. If you purchase through links on our site, we may earn an affiliate commission at no extra cost to you.
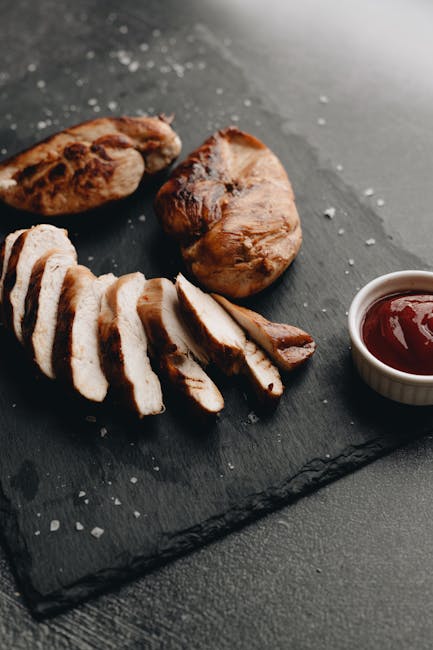
Imagine biting into a perfectly cooked chicken breast: juicy, tender, and bursting with flavor. Sounds irresistible, right?
If you’re looking to create this culinary delight in your own kitchen, you’ve come to the right place. With the magic of an air fryer, achieving a delicious chicken breast is not only possible but incredibly easy. No more worrying about dry, overcooked chicken; the air fryer ensures your meal is cooked evenly and retains its moisture.
You might be wondering how to get that perfect balance of crispness and juiciness. Don’t worry, we’ve got you covered. This article will reveal the best recipe for chicken breast in an air fryer, making sure you impress your taste buds and anyone you serve it to. Keep reading to discover secrets that will transform a simple chicken breast into a mouthwatering masterpiece. Your kitchen is about to become your favorite restaurant!
Ingredients List
Cooking chicken breast in an air fryer is a breeze. It turns out juicy and delicious every time. Key to success is having the right ingredients. Below, you’ll find a straightforward list. Each item enhances flavor and texture. Let’s dive into the essentials.
Ingredients For Air Fryer Chicken Breast
Simple ingredients make the best dishes. Here’s what you need:
Chicken Breast
Choose boneless, skinless chicken breasts. They cook evenly in the air fryer. Ensure they are fresh for the best taste.
Olive Oil
Olive oil helps crisp the chicken. It adds a rich flavor. Just a tablespoon is enough.
Salt And Pepper
Salt and pepper are basic but crucial. They enhance the natural flavors. Use them as per taste.
Garlic Powder
Garlic powder adds depth to the flavor. It’s a must-have for that savory kick.
Paprika
Paprika gives a smoky flavor. It also adds a beautiful color. Mild or hot, choose your preference.
Italian Seasoning
Italian seasoning brings herbs into play. It provides a balanced, aromatic touch. Perfect for a Mediterranean vibe.
Lemon Juice
Lemon juice brightens the dish. It adds a fresh, tangy note. Just a splash can make a difference.
Gather these ingredients to elevate your chicken breast. Each plays a vital role in the final dish. Ready your air fryer for a flavorful journey!
Preparation Steps
Preparing chicken breast in an air fryer is simple and rewarding. The preparation steps ensure your chicken is juicy and full of flavor. Let’s explore how to marinate and season your chicken for the best results.
Marinating Chicken
Marinating infuses the chicken with rich flavors. Start with a basic marinade of olive oil, lemon juice, and garlic. Mix them in a bowl. Add salt and pepper for taste. Place the chicken breasts in the bowl. Make sure the marinade covers each piece. Let it sit for at least 30 minutes. For more flavor, marinate overnight in the fridge.
Seasoning Options
Seasoning adds a unique taste to your chicken. Try simple herbs like rosemary or thyme. Paprika and cayenne pepper add a spicy kick. For a sweet touch, use honey and mustard. Combine spices in a small bowl. Sprinkle evenly over the chicken breasts. Ensure every part gets coated for even flavor.
Air Fryer Setup
Setting up your air fryer is key for perfect chicken breast. Proper setup ensures even cooking and juicy results. Follow these steps for a hassle-free cooking experience.
Preheating Tips
Preheating your air fryer is essential. It helps achieve crispy chicken skin. Set the fryer to the desired temperature before adding chicken. Preheat for at least 3 minutes. This mimics an oven’s preheating step. It ensures the chicken starts cooking immediately.
Basket Arrangement
Arrange chicken pieces in a single layer in the basket. Avoid overcrowding to ensure even cooking. Air should circulate freely around each piece. This prevents soggy spots and ensures crispy skin. Use a small rack if needed to layer pieces.
Adequate spacing is vital for cooking efficiency. It allows hot air to reach all sides. This method results in evenly cooked, juicy chicken.
Cooking Process
The air fryer brings simplicity to cooking chicken breast. It’s fast, healthy, and delivers moist results. With precise settings, your chicken becomes tender and flavorful. Let’s explore the essential steps for cooking chicken breast in your air fryer.
Temperature Settings
Setting the right temperature is crucial. For chicken breast, 375°F (190°C) works well. This setting ensures the chicken cooks evenly. The heat penetrates the meat, preserving its juices. Avoid setting the temperature too high. It can dry out the chicken. Keep it steady for perfect results.
Cooking Duration
Timing is key. Cook chicken breast for 18-20 minutes. This duration allows the inside to cook thoroughly. Flip the chicken halfway through. It helps achieve a crispy exterior. Always check the internal temperature. It should reach 165°F (74°C) for safety.
Following these steps, your air fryer chicken breast turns out delicious. Enjoy a meal that’s both healthy and satisfying.
Achieving Crispiness
Cooking chicken breast in an air fryer is a game-changer. You get that perfect balance of juicy meat and crispy exterior without drowning it in oil. Achieving crispiness is what makes this method truly shine. You might wonder how to get that golden, crunchy texture without compromising on moisture. Let’s dive into some effective techniques that can help you master the art of crispy chicken breast.
Coating Techniques
The secret to a crispy chicken breast lies in the coating. A simple mixture of flour, breadcrumbs, or crushed cornflakes can do wonders. Have you ever tried adding some grated Parmesan to your breadcrumb mix? It adds a rich flavor and an extra crispy texture. Season your coating well with salt, pepper, and any herbs or spices you love. This not only enhances the taste but also gives your chicken a vibrant color.
Consider a two-step coating process. First, dip the chicken in flour, then into beaten eggs, and finally roll it in your breadcrumb mixture. The egg acts as a binder, helping the crumbs stick better. This layered approach ensures a crunchy bite every time.
Flip And Turn
Don’t forget the importance of flipping and turning. You want every side of your chicken to be equally crispy. Halfway through the cooking time, turn the chicken breast over. This ensures even cooking and browning.
Have you experienced uneven cooking in the past? It’s likely because the chicken wasn’t flipped. By turning the chicken, you prevent one side from becoming soggy while the other crisps up. It might seem tedious, but a quick turn can make all the difference.
Are you ready to try this out? Imagine the satisfaction of biting into a perfectly crispy chicken breast, knowing you’ve mastered the technique. So, next time you use your air fryer, remember these tips for achieving that ideal crunch.
Serving Suggestions
Enhance flavors by pairing air-fried chicken breast with roasted vegetables or a crisp green salad. Drizzle honey mustard or garlic aioli for extra zest. Serve with fluffy rice or creamy mashed potatoes for a satisfying meal.
Enjoying a delicious chicken breast cooked in an air fryer is a satisfying experience. But how do you elevate that meal to the next level? The right serving suggestions can transform a simple chicken dish into a culinary delight. With the perfect side dishes and sauce pairings, your air fryer chicken breast can be the star of your dinner table. Let’s explore some ideas.
Side Dishes
Pair your air fryer chicken breast with side dishes that complement its flavors and textures. Roasted vegetables like carrots, bell peppers, and broccoli can add a healthy and vibrant touch to your meal. You can also try a quinoa salad with cherry tomatoes and feta cheese for a fresh, satisfying side. If you prefer something hearty, mashed potatoes or buttery corn on the cob are classic choices. A personal favorite is a simple green salad with a light vinaigrette that refreshes the palate and balances the dish. What side dish would make your meal memorable?
Sauce Pairings
Sauces can elevate your chicken breast from good to extraordinary. Consider a garlic aioli for a creamy and slightly tangy addition. If you love a bit of heat, a spicy sriracha mayo can add a kick without overwhelming the dish. For those who enjoy sweet and savory combinations, a honey mustard sauce or a barbecue glaze can be delightful. A lemon herb sauce can add a zesty freshness that pairs beautifully with the juicy chicken. Which sauce would you choose to complement your dish? Experimenting with different sides and sauces can make each meal unique. Next time you use your air fryer, think about how these elements can enhance your chicken breast. What will you try first?
Storage Tips
Storing your delicious air fryer chicken breast correctly is essential. Proper storage keeps it fresh and tasty for longer. Below are some practical storage tips. These will help maintain the flavor and texture of your dish.
Refrigeration
First, let your chicken breast cool to room temperature. Do not leave it out for more than two hours. Once cooled, place the chicken in an airtight container. This helps lock in moisture and flavor. Store it in the refrigerator for up to four days. Use a shallow container for even cooling.
Reheating Methods
Reheating your chicken breast can be simple. The air fryer is a great option. Preheat it to 350°F. Then, reheat the chicken for 3-4 minutes. This keeps it crispy on the outside. For a microwave, cover the chicken with a damp paper towel. Heat on medium for 1-2 minutes. Check that it’s warmed through. An oven works well too. Set it to 350°F and heat for about 10 minutes.
Frequently Asked Questions
What Is The Best Way To Cook A Chicken Breast In The Air Fryer?
Season chicken breast with salt, pepper, and spices. Preheat air fryer to 375°F. Cook for 15 minutes, flipping halfway. Ensure the internal temperature reaches 165°F. Let it rest before serving for juicy results. Enjoy a healthy, delicious meal in minutes with this method.
How Do You Keep Chicken Breast From Drying Out In An Air Fryer?
Brush chicken breast with oil before air frying. Use a marinade or brine for extra moisture. Cook at a lower temperature. Check internal temperature to avoid overcooking. Let it rest before slicing to retain juices.
Should I Put Flour On My Chicken Before Putting It In The Air Fryer?
Coating chicken with flour before air frying can create a crispy texture. Use seasoned flour for added flavor. Ensure an even coating to avoid clumping. Lightly spray with oil for extra crispiness. This method mimics traditional frying without excess oil.
Enjoy healthier, delicious results!
Is It Better To Bake Or Air Fry Chicken Breast In An Air Fryer?
Air frying chicken breast results in a crispy texture and faster cooking time. Baking preserves moisture better. Choose based on preference for crispiness or juiciness. Both methods offer healthy options, but air frying uses less oil, making it slightly healthier.
Conclusion
Cooking chicken breast in an air fryer is simple and tasty. The air fryer makes the chicken crispy outside and juicy inside. It’s a quick method for busy days. Experiment with spices for flavor. This recipe is easy for beginners.
It’s a healthier option too. No need for extra oil. Serve with your favorite sides. Enjoy a delicious meal with less effort. Perfect for family dinners or solo meals. Try it today and savor the taste. Cooking chicken has never been so fun and simple.
Happy cooking!