Affiliate Disclosure: This post may contain affiliate links. If you purchase through links on our site, we may earn an affiliate commission at no extra cost to you.
Cooking chicken breast in the oven can be a simple yet tricky task. You want it juicy, flavorful, and perfectly done.
But what’s the best temperature to achieve this culinary masterpiece? Whether you’re hosting a dinner party or cooking a quick meal for yourself, knowing the ideal oven temperature can make all the difference. Imagine serving chicken that’s not just cooked, but cooked to perfection—moist, tender, and delicious.
Your guests will be raving, and you’ll feel like a kitchen hero. We’ll uncover the secret temperature that elevates your chicken breast from ordinary to extraordinary. Get ready to transform your cooking game!
Ideal Oven Temperature
Cooking chicken breast in the oven is a common method. Yet, choosing the right temperature can be confusing. The oven temperature affects the taste and texture of the chicken.
If too high, the chicken may dry out. If too low, it might not cook evenly. Finding the ideal temperature ensures juicy and flavorful chicken.
Why 375°f Is Perfect
375°F is a great oven temperature for chicken breast. It allows the meat to cook thoroughly. This temperature keeps the chicken moist inside.
It also ensures a nice, golden color on the outside. Cooking at 375°F balances speed and flavor.
Ensuring Even Cooking
Even cooking is important for chicken breast. At 375°F, the chicken cooks evenly. It reduces the risk of raw spots inside.
Use a meat thermometer to check the internal temperature. The chicken should reach 165°F at its thickest part.
Avoiding Dryness
Dry chicken is a common problem. Cooking at 375°F helps prevent dryness. Cover the chicken with foil for the first half of cooking.
This step traps moisture inside. Remove the foil to let the skin brown in the last minutes.
Adjusting For Different Sizes
Chicken breasts vary in size. Larger pieces take longer to cook. At 375°F, a medium breast cooks in 25-30 minutes.
For larger pieces, allow extra time. Check with a thermometer to ensure doneness.
Preheating The Oven
Preheating the oven is a crucial step in cooking chicken breast. It ensures even cooking and helps retain moisture. A properly preheated oven sets the stage for a juicy, flavorful meal. Without this step, the chicken might cook unevenly, leaving some parts dry or undercooked.
Preheat To 375°f For Optimal Results
Set the oven to 375°F for cooking chicken breast. This temperature balances cooking speed and moisture retention. It ensures the chicken cooks evenly, with a tender texture.
Use An Oven Thermometer For Accuracy
Oven thermostats can be inaccurate. Place an oven thermometer inside to confirm the temperature. This tool helps achieve the desired heat, preventing overcooking or undercooking.
Allow Sufficient Preheating Time
Give the oven ample time to reach 375°F. Usually, this takes about 15 minutes. This ensures the oven is ready for baking chicken breast perfectly.
Keep The Oven Door Closed
Opening the oven door releases heat. Keep it closed during preheating. This maintains consistent temperature, essential for cooking chicken breast properly.
Thickness And Cooking Time
Cooking chicken breast in the oven requires attention to its thickness. The thickness directly impacts the cooking time, ensuring the meat is fully cooked. A precise understanding of this relationship helps achieve juicy, tender chicken. Let’s explore the connection between thickness and cooking time.
Understanding Thickness
Chicken breasts vary in size and thickness. Thin pieces cook faster, while thick ones take longer. It’s important to measure the thickest part for accuracy. This ensures the entire piece cooks evenly.
Recommended Cooking Time
For chicken breasts about 1 inch thick, bake for 20 to 30 minutes. This time frame works for an oven preheated to 375°F (190°C). Thicker pieces, around 1.5 inches, may need 30 to 40 minutes. Always check the internal temperature. It should reach 165°F (74°C) for safety.
Adjusting For Thin Breasts
Thin chicken breasts, less than 1 inch, require less time. Aim for 15 to 20 minutes in the oven. Shorter cooking times prevent drying out. Remember to check the internal temperature. Ensuring safety and taste.
Benefits Of Uniform Thickness
Uniform thickness promotes even cooking. Use a meat mallet to pound thicker parts. This technique ensures consistent thickness. It helps avoid undercooked sections.
Final Temperature Check
Always verify with a meat thermometer. Insert it into the thickest part. The safe temperature is 165°F (74°C). This ensures the chicken is safe and delicious.
Seasoning Techniques
Seasoning chicken breast before cooking is crucial for flavor. Different techniques can enhance taste and texture. Explore these methods for delicious results.
Use Fresh Herbs
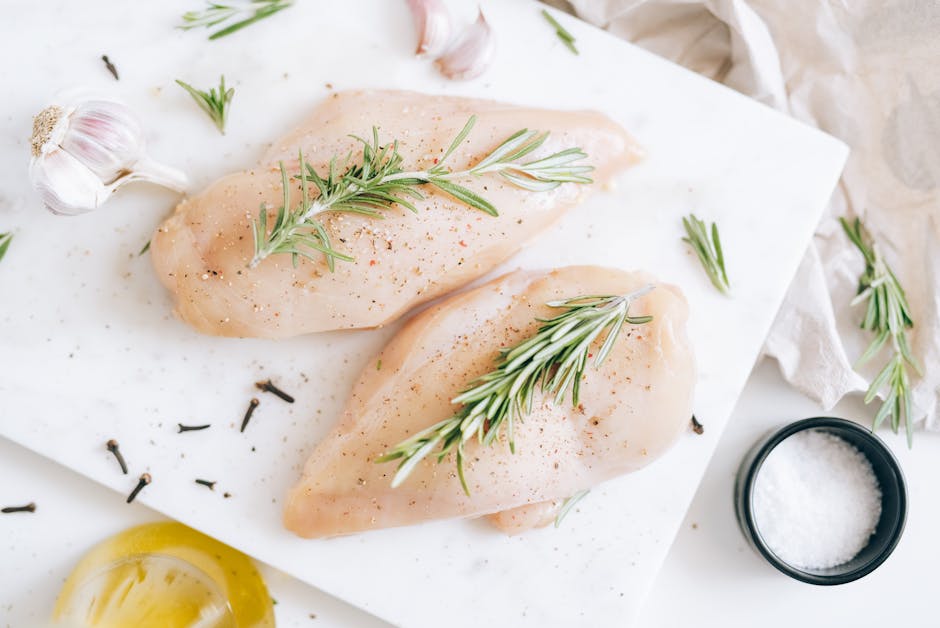
Fresh herbs like rosemary add a vibrant taste. Combine them with lemon for a zesty flavor. Thyme and parsley work well too. Chop them finely and sprinkle over the chicken.
Marinade Magic
Marinades infuse the chicken with flavor. Mix olive oil, garlic, and vinegar for a simple marinade. Let the chicken soak for at least 30 minutes. This method makes the meat tender.
Dry Rub Delight
Dry rubs create a flavorful crust. Use spices like paprika and cumin. Mix them with salt and pepper. Rub the mixture evenly over the chicken. Let it sit for 15 minutes before baking.
Savory Sauces
Sauces add moisture and flavor. Try a honey mustard sauce for a sweet touch. Or a barbecue sauce for smoky flavor. Brush the sauce onto the chicken before baking.
Moisture Retention Tips
Cooking chicken breast at 375°F ensures juicy results. This temperature helps retain moisture well. For best texture, avoid overcooking.
When baking chicken breast, ensuring it stays juicy is crucial. Dry chicken can ruin a meal. Here, we explore tips to keep your chicken moist. These methods enhance the flavor and texture. Discover techniques that protect against dryness.
Preheat The Oven Properly
Preheating the oven is vital. It ensures even cooking. Set the oven to 375°F for optimal results. This temperature is ideal for chicken breast. It cooks without drying out the meat.
Use A Meat Thermometer
A meat thermometer is your best friend. Check the chicken’s internal temperature. It should reach 165°F. This prevents overcooking, which can dry out the chicken.
Brine For Juiciness
Brining can enhance moisture. Soak the chicken in a saltwater solution. Do this for at least 30 minutes. Brining adds flavor and keeps the meat tender.
Cover With Foil
Foil can protect the chicken. Cover the baking dish while cooking. This traps steam and moisture. Your chicken will be juicy and delicious.
Rest Before Serving
Let the chicken rest after baking. Leave it for five minutes. Resting allows juices to redistribute. This results in tender, succulent meat. Implementing these tips will make your chicken meals unforgettable. Enjoy a juicy, flavorful dish every time.
Checking Doneness
Cooking chicken breast in the oven requires careful attention. Ensuring the chicken is cooked through is vital. Undercooked chicken can lead to health issues. Overcooked chicken becomes dry and less appetizing. Checking doneness is a crucial step in the cooking process.
Using A Meat Thermometer
A meat thermometer is your best friend in the kitchen. Insert it into the thickest part of the chicken breast. The ideal temperature should read 165°F (74°C). This ensures the chicken is safe and juicy.
Visual Inspection
Observe the chicken’s color and texture. Cooked chicken turns white throughout. Juices run clear when pierced with a fork. These are good indicators of doneness.
Touch Method
Feel the chicken breast with your finger. It should be firm to the touch. Soft or spongy texture means it needs more time. Practice improves your skill with this method.
Cooking Time Considerations
Chicken breast size affects cooking time. Larger pieces take longer to cook. Always check doneness regardless of the clock. This ensures perfect results every time.
Resting Before Serving
Resting chicken breast after cooking enhances its flavor and juiciness. Allowing it to rest ensures even distribution of juices. This step is crucial for achieving tender and moist meat. Skipping this can lead to a dry and tough texture.
Why Resting Is Important
Resting allows the chicken fibers to relax. This helps retain more juices. The result is a more succulent bite. Skipping this step can cause juices to spill out when cut. Resting ensures every bite is flavorful.
How Long Should Chicken Rest?
Allow the chicken to rest for at least 5 minutes. This short time can make a big difference. Larger pieces may need up to 10 minutes. Use this time to prepare sides or set the table. Patience here pays off with better taste.
Covering The Chicken While Resting
Cover the chicken loosely with foil. This retains heat while preventing overcooking. Avoid sealing too tightly. Trapped steam can make the skin soggy. A loose cover strikes the right balance.
Checking For Doneness After Resting
After resting, ensure the chicken is fully cooked. Use a meat thermometer to check. The ideal temperature is 165°F (75°C). If below this, return it to the oven briefly. Safety is key when serving poultry.
Common Mistakes
Cooking chicken breast often leads to dry results due to incorrect oven temperatures. Many assume higher heat speeds cooking, but it sacrifices moisture. Ensuring the oven is preheated correctly is crucial for juicy, tender chicken.
Cooking chicken breast in the oven can be tricky, especially if you’re not aware of common pitfalls that can lead to a dry and flavorless meal. Understanding these common mistakes can help you achieve that perfect, juicy chicken breast every time. Let’s dive into what you might be doing wrong and how to fix it.
1. Not Preheating The Oven
Preheating your oven is crucial. If you skip this step, your chicken breast might cook unevenly, leading to a tough exterior and undercooked interior. Always start with a properly preheated oven to ensure consistent cooking.
2. Using The Wrong Temperature
Setting the oven at an incorrect temperature can ruin your chicken breast. Many people set it too high, thinking it will cook faster. However, this often results in a dry texture. Aim for 375°F (190°C) to strike a balance between speed and tenderness.
3. Overcooking The Chicken
Overcooking is a common mistake that can turn your chicken into a chewy disappointment. Keep an eye on the time and use a meat thermometer. A perfectly cooked chicken breast should reach an internal temperature of 165°F (74°C).
4. Not Seasoning Properly
Imagine biting into a bland piece of chicken. It’s not just about salt and pepper. Experiment with herbs and spices, like thyme or paprika, for added flavor. Seasoning well before cooking makes a significant difference.
5. Skipping The Resting Period
After cooking, allow your chicken breast to rest for a few minutes before slicing. This helps the juices redistribute, ensuring a moist and flavorful bite. Rushing to cut it immediately can result in loss of those delicious juices.
6. Ignoring The Thickness Of The Chicken Breast
The thickness matters. A thicker piece will require more time than a thinner one. Consider pounding the chicken to an even thickness for uniform cooking. Have you ever tried this trick? You might be surprised at the difference it makes.
7. Relying Solely On Visual Cues
Judging doneness based on appearance alone is misleading. Chicken can look cooked on the outside while still raw inside. Trust your thermometer for accuracy. Have you ever cut into what looked like a perfectly cooked chicken only to find it still pink? Knowing these mistakes is half the battle. How many of these have you been guilty of in the past? Adjust your approach, and you’ll be on your way to mastering the art of oven-cooked chicken breast.
Frequently Asked Questions
Is It Better To Bake Chicken At 350 Or 400?
Bake chicken at 350°F for tender meat or 400°F for crispy skin. Choose based on your preference. Ensure chicken reaches an internal temperature of 165°F. Lower temperatures cook evenly, while higher temperatures add crispiness. Use a meat thermometer for accuracy and delicious results.
What Is The Best Way To Cook Chicken Breast Without Drying It Out?
To keep chicken breast juicy, marinate it for 30 minutes. Cook it using a sous-vide method or bake it at 375°F for 20-30 minutes. Let it rest for 5 minutes before slicing. Avoid overcooking by using a meat thermometer, ensuring the internal temperature reaches 165°F.
How Long Do You Bake Chicken At 375 Degrees?
Bake chicken at 375 degrees Fahrenheit for 25 to 30 minutes per pound. Check internal temperature for safety. It should reach 165 degrees Fahrenheit. Adjust time based on chicken thickness and oven type. Use a meat thermometer for accuracy. Ensure even cooking by turning the chicken halfway through.
Is It Better To Bake Chicken Legs At 350 Or 400?
Baking chicken legs at 400°F results in crispier skin and juicier meat. Cooking at 350°F takes longer and produces a more tender texture. For a balance of crispy and juicy, 400°F is often preferred. Always ensure the internal temperature reaches 165°F for safety.
Conclusion
Cooking chicken breast in the oven requires the right temperature. It’s key for juicy, tender meat. Preheat to 375°F for best results. This temperature cooks evenly. Retains moisture too. Always use a meat thermometer. Aim for 165°F internal temperature. Rest chicken before slicing.
Keeps it juicy. Experiment with spices and herbs. Create flavors you love. Enjoy your perfectly cooked chicken breast!