Affiliate Disclosure: This post may contain affiliate links. If you purchase through links on our site, we may earn an affiliate commission at no extra cost to you.
Imagine biting into a perfectly seared steak, juicy on the inside and crusty on the outside. Sounds delicious, right?
If you’re a steak lover, you know the reverse sear method is a game-changer. But there’s a secret ingredient to achieving that mouthwatering perfection: the right oven temperature. You’ve probably heard of reverse searing, but do you know the best oven temp to get it just right?
We’ll unlock that secret. It’s not just about cooking; it’s about transforming your kitchen into a steakhouse. So, if you’re ready to elevate your steak game and impress your taste buds, keep reading. The secret to your best steak yet is just a few scrolls away.
Reverse Searing Explained
Reverse searing transforms a simple steak into a gourmet delight. It flips the traditional cooking method. First, you slow-cook the meat. Then, you give it a quick, high-heat sear. This technique ensures a juicy inside and a crispy crust.
Many chefs prefer this method for its precision. It allows better control over the final temperature. The meat cooks evenly. No more overcooked edges and undercooked centers. Reverse searing is perfect for thick cuts of meat. Now, let’s dive into the details.
What Is Reverse Searing?
Reverse searing is a two-step cooking process. First, cook the meat at a low temperature. Use an oven for this step. The goal is to cook it evenly inside. After reaching the desired temperature, remove the meat from the oven.
Why Reverse Searing Works
It works because it gives you control. Low heat cooks the meat evenly. It retains moisture. The final sear adds flavor and texture. High heat creates a caramelized crust. This is the tasty, brown surface we all love.
Benefits Of Reverse Searing
Reverse searing has many benefits. It reduces the risk of overcooking. Your steak stays juicy. It also enhances flavor. The crust adds a satisfying crunch. This method is ideal for thick steaks.
Tools Needed For Reverse Searing
You’ll need a few tools. An oven and a skillet are essential. A meat thermometer is crucial. It ensures the right temperature. A wire rack helps with even cooking. These tools make the process easy.
Choosing The Right Cut
Reverse searing is a culinary technique that transforms a good steak into a masterpiece. However, the success of this method largely depends on choosing the right cut. You might wonder, does the cut really matter? Absolutely. Different cuts have unique qualities that affect how they react to heat. Choosing wisely can make the difference between a tender, juicy steak and a chewy, disappointing one.
Best Steak Cuts
When selecting a steak for reverse searing, consider cuts like ribeye, strip steak, or filet mignon. These cuts have marbling, which means they’re packed with flavor. Ribeye is known for its rich taste and tenderness, while the strip steak offers a balance of flavor and texture. Filet mignon, although less marbled, is exceptionally tender. Have you tried experimenting with different cuts? You might discover a personal favorite that surprises you.
Thickness Matters
Thickness is crucial for achieving the perfect reverse sear. Aim for steaks that are at least one inch thick. Thinner steaks tend to cook too quickly, missing out on that desirable crust. A thicker cut allows for a more controlled cooking process, ensuring the inside is perfectly done while the outside gets that stunning sear. Consider how you like your steak cooked. Thicker cuts offer more flexibility in achieving your preferred level of doneness.
Choosing the right cut and thickness is key to mastering the art of reverse searing. Have you considered trying different combinations to find your perfect steak experience? The journey of experimentation can lead to delicious discoveries.
Preparing Your Steak
Reverse searing a steak brings out its best flavor. Preparing your steak correctly is key. This involves careful seasoning, understanding room temperature, and more. Let’s delve into these essential steps.
Seasoning Tips
Season your steak generously with salt. It enhances the meat’s natural taste. Use freshly ground black pepper for added flavor. Some prefer garlic powder or herbs. Experiment with different spices. Let the seasoning sit for at least an hour. It allows flavors to penetrate the meat.
Room Temperature Importance
Bring your steak to room temperature before cooking. This ensures even cooking. A cold steak won’t cook evenly. Let it sit out for 30 to 60 minutes. This step is crucial for a perfect reverse sear. It also helps the steak to retain its juices.
Setting The Oven Temperature
Setting the oven to 275°F creates the ideal environment for a reverse sear. This low temperature ensures even cooking and retains juices, resulting in a tender and flavorful steak.
Setting the right oven temperature is crucial when reverse searing your meat to perfection. It’s not just about following a recipe; it’s about understanding how heat affects your food. The temperature you choose can make or break the texture and flavor of your dish.
Ideal Temperature Range
Most experts recommend setting your oven between 225°F and 275°F for reverse searing. This range allows the meat to cook slowly and evenly. It helps to retain moisture, ensuring a juicy, tender result. Cooking at a lower temperature gives you more control. It prevents overcooking and allows the meat to reach the desired internal temperature gradually. This slow process enhances the flavor and texture, making each bite enjoyable.
Impact Of Oven Type
The type of oven you use can influence the cooking process. Convection ovens, for example, circulate air more efficiently, which can lead to faster cooking times. You might need to adjust the temperature slightly lower than a conventional oven. On the other hand, traditional ovens might have hot spots. It’s crucial to rotate your meat halfway through cooking to ensure even heat distribution. Do you know your oven’s quirks? Getting familiar with them can improve your cooking results. Experimenting with your oven can reveal its unique characteristics. This helps you to make the necessary adjustments for a perfect reverse sear. Don’t be afraid to take notes on what works best for you.
Cooking Time Guidelines
Achieving a perfect reverse sear involves setting your oven to 225°F (107°C). This temperature ensures even cooking and a juicy interior. After reaching the desired internal temperature, finish with a high-heat sear for a crispy crust.
Are you wondering how long you should cook your steak when using the reverse sear method? You’re not alone. Cooking time is crucial to achieving that perfect steak – juicy inside with a crispy, caramelized crust. Let’s break it down into easy-to-follow guidelines so you can master the art of reverse searing.
Time Per Thickness
The thickness of your steak matters. A 1-inch steak generally takes about 45 minutes in the oven at 275°F. Thicker cuts, like a 2-inch steak, might require up to an hour. Keep an eye on it, though. Even slight variations in thickness can affect cooking time. If you’re like me and love experimenting with different thicknesses, jot down your observations. It’s all about finding what works best for your taste. Have you ever tried different thicknesses back-to-back to compare? It’s a fun way to discover your preference.
Using A Meat Thermometer
A meat thermometer is your best friend in this process. Insert it into the thickest part of the steak. For medium-rare, aim for an internal temperature of about 125°F before searing. It’s all about precision. Without a thermometer, you’re guessing. Have you ever cut into a steak, only to find it overcooked? A thermometer eliminates that risk. Why leave it to chance when you can ensure perfection? What’s holding you back from investing in this simple tool? It’s a game-changer for consistent results. Apply these cooking time guidelines, and you’ll be reverse-searing like a pro. What will you try out next?
Searing Techniques
Achieving the perfect reverse sear requires setting your oven to 225°F. This temperature ensures even cooking without drying out the meat. Finish with a hot sear for a delicious crust.
Searing Techniques Reverse searing is a popular cooking method for achieving a perfectly cooked steak with a flavorful crust. The process involves slow-cooking the meat at a low temperature, then finishing it off with a high-heat sear. But what is the best way to sear your steak? Let’s dive into some effective searing techniques to elevate your culinary skills.
Pan Searing Basics
Pan searing is a straightforward method that can yield a beautiful crust on your steak. Start by heating a heavy skillet, like cast iron, over high heat until it’s smoking hot. This ensures the steak sears quickly, locking in juices and flavors. Use a high smoke point oil, such as canola or avocado oil, to coat the pan. Season your steak with salt and pepper just before placing it in the pan. Sear each side for about 1-2 minutes until a golden-brown crust forms. Ever noticed how restaurant steaks have that mouth-watering sear? You can achieve the same at home with this simple technique.
Grill Searing Tips
Grilling offers a unique smoky flavor that you can’t get from a pan. Preheat your grill to high, making sure it’s piping hot before you begin. This step is crucial for creating those iconic grill marks. Place your steak on the grill grates directly over the flames. Close the lid to maintain heat and sear each side for 1-2 minutes. Do you prefer your steak with a hint of smokiness? Grilling is your go-to technique for adding that extra layer of flavor. Remember, the key to a successful sear is high heat. Whether you’re using a pan or a grill, ensure your cooking surface is hot enough to create a delicious crust. This is the finishing touch that brings out the best in your reverse-seared steak. So, what’s your go-to searing method? Have you tried both and noticed any differences in flavor or texture? Share your experiences and let’s perfect the art of reverse searing together!
Resting The Steak
For a perfect reverse sear, set the oven to 275°F. Resting the steak after this step is crucial. This allows the juices to redistribute, ensuring every bite is tender and flavorful.
Resting the steak is an essential step in the reverse sear process. After cooking, steaks need time to settle. This helps ensure juiciness and flavor. Resting allows the juices to redistribute. Without resting, juices could escape. This would make the steak dry. Here, we explore why resting matters and the optimal resting time.
Why Resting Matters
Resting lets the juices settle in the meat. During cooking, heat pushes juices to the edges. Resting allows these juices to move back. This makes the steak juicy and tender. Skipping this step may lead to a dry steak. A well-rested steak enhances the dining experience. It’s a simple step with big rewards.
Optimal Resting Time
The ideal resting time for a steak is 5 to 10 minutes. This time frame helps achieve the best results. Larger cuts may need a bit more time. Use a warm plate to keep the steak from cooling. Avoid covering tightly, which can make the steak soggy. Let the steak breathe and rest peacefully. This ensures a perfect, juicy bite every time.
Troubleshooting Common Issues
Reverse searing is a popular technique for cooking steak perfectly. It involves cooking the steak slowly and then searing it at high heat. This method helps achieve a beautiful crust and juicy interior. Despite its popularity, some common issues can arise. These might include overcooking or failing to reach the desired doneness. Understanding these issues and how to fix them is crucial.
Avoiding Overcooking
Overcooking is a frequent problem with reverse searing. The key is monitoring your steak’s internal temperature. Use a reliable meat thermometer. Check the temperature regularly. Aim for an internal temperature slightly below your target. The steak will continue cooking during the searing process.
Maintain an oven temperature between 225°F and 250°F. This ensures slow cooking without drying out the meat. Be patient and resist the urge to increase the heat. Slow cooking allows even heat distribution. This prevents the meat from becoming tough.
Achieving Desired Doneness
Getting the perfect doneness requires attention to detail. Different cuts require different cooking times. Know your steak and adjust accordingly. For medium-rare, aim for an internal temperature of 130°F before searing. For medium, target 140°F. The final sear will add 5-10°F to the temperature.
Let the steak rest after cooking. Resting allows juices to redistribute. This enhances flavor and tenderness. Always slice against the grain for best results. This ensures a tender bite. Proper technique leads to a satisfying meal.
Serving Suggestions
Set your oven to 275°F for a perfect reverse sear. This temperature ensures juicy meat with a crispy crust. Serve your steak with roasted veggies or a fresh salad for a balanced meal.
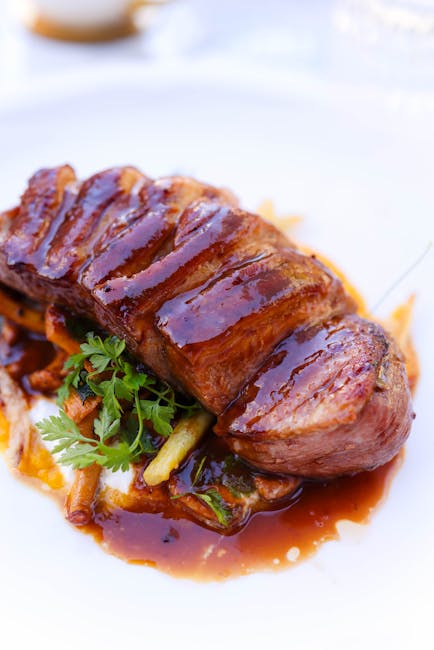
When you master the reverse sear technique, you unlock a world of flavors that elevate your dining experience. But what truly brings the dish to life is how you serve it. It’s not just about the perfectly cooked meat; it’s about the entire meal coming together harmoniously. From choosing the right sides to drizzling the perfect sauce, these serving suggestions will ensure your meal is unforgettable.
Pairing With Sides
Choosing the right sides can enhance the flavors of your reverse-seared meat. Imagine a plate with buttery mashed potatoes that soak up the meat’s juices. Add a crisp, refreshing green salad with a tangy vinaigrette to cut through the richness. Consider roasted vegetables like Brussels sprouts or carrots, which offer a sweet and savory contrast. What’s your go-to side dish that never fails to impress?
Sauce Recommendations
The perfect sauce can elevate your dish to new heights. A classic chimichurri, with its vibrant herbs and garlic, adds a fresh zing. If you prefer something creamy, a homemade béarnaise sauce is luxurious with its hint of tarragon. For those who love a bit of heat, try a spicy peppercorn sauce to awaken your taste buds. Which sauce will you choose to take your meal to the next level?
Frequently Asked Questions
Is 225 Or 250 For Reverse Sear?
Use 225°F for a longer cook, ensuring tenderness, while 250°F speeds up the process. Both temperatures work for reverse searing, depending on your time preference. Lower heat enhances flavor, while higher heat saves time. Always finish with a high-heat sear for a perfect crust.
Can You Reverse Sear At 425?
Yes, you can reverse sear at 425°F. First, cook the meat at a lower temperature. Once done, increase the oven to 425°F for a crispy finish. This method enhances flavor and texture, offering a perfect balance between tenderness and a crispy crust.
What Is The Ideal Oven Temperature For Reverse Sear?
The ideal oven temperature for reverse sear is 225°F (107°C). This low and slow method ensures even cooking. It allows the meat to reach the desired internal temperature without overcooking the outer layers. This results in a tender and juicy interior with a perfect crust.
How Long To Cook Meat At 225°f For Reverse Sear?
Cooking meat at 225°F for reverse sear typically takes 45 to 60 minutes. The time can vary based on the meat’s thickness. Use a meat thermometer to check the internal temperature. Once it reaches about 10°F below the desired level, it’s ready to sear.
Conclusion
Finding the right oven temperature is key for reverse searing success. Aim for around 225°F for slow cooking. This ensures tender and juicy meat. After that, a quick sear on high heat locks in flavor. Your meat will have a perfect crust.
Experiment with temperatures to suit your taste. Remember, patience is crucial for this method. With practice, you’ll achieve delicious results every time. Enjoy the rich, savory flavors of your expertly cooked dish. Reverse searing can elevate your cooking skills. Happy cooking and enjoy your meal!