Affiliate Disclosure: This post may contain affiliate links. If you purchase through links on our site, we may earn an affiliate commission at no extra cost to you.
Imagine biting into a slice of pizza with a perfectly crispy crust, soft yet chewy interior, and flavors that just melt in your mouth. Sounds like a dream, right?
Well, with the right pizza dough recipe, you can turn that dream into a delicious reality right in your oven at home. If you’ve ever struggled to get your homemade pizza just right, you’re not alone. But the good news is, you’re about to discover the best pizza dough recipe tailored specifically for baking in an oven.
This isn’t just any recipe—it’s crafted with precision and simplicity, ensuring that every bite you take is a slice of heaven. Stick around, because mastering this dough could transform your pizza nights forever. Are you ready to impress your taste buds and maybe even your guests? Let’s dive in!
Ingredients For Perfect Pizza Dough
Creating the perfect pizza dough starts with selecting the right ingredients. Quality ingredients make a noticeable difference in taste and texture. Let’s dive into the essential components for making the best pizza dough for your oven.
Flour
Flour is the foundation of pizza dough. Use all-purpose or bread flour for the best results. Bread flour gives a chewier crust, while all-purpose flour offers a lighter texture. Choose flour based on your crust preference.
Water
Water hydrates the flour, forming gluten. Use warm water, around 110°F, to activate the yeast. Cold water slows down the yeast activity, affecting the dough rise.
Yeast
Yeast is crucial for dough rising. Use active dry yeast or instant yeast. Both types work well for pizza dough. Ensure the yeast is fresh to avoid flat dough.
Salt
Salt enhances flavor and strengthens the dough structure. Use fine sea salt or kosher salt. Avoid using table salt, as it may contain anti-caking agents.
Olive Oil
Olive oil adds richness and elasticity to the dough. It helps create a tender crust. Drizzle a bit into the dough mix for added flavor.
Sugar
Sugar feeds the yeast, aiding in fermentation. It also adds a hint of sweetness. Use white sugar or honey as a substitute.
Choosing The Right Flour
Choosing the right flour is crucial for perfect pizza dough. The type of flour influences texture, flavor, and dough elasticity. Different flours offer unique attributes. Understanding these can lead to a tastier pizza experience.
All-purpose Flour: Versatile And Accessible
All-purpose flour is a popular choice. It’s easy to find and affordable. This flour works well for a soft, chewy crust. It has a moderate protein content. This provides a decent gluten structure. Ideal for beginners in homemade pizza making.
Bread Flour: For A Chewy, Elastic Crust
Bread flour has a higher protein content. This creates more gluten, leading to a chewier crust. It gives the dough elasticity. Perfect for those who prefer a robust bite. Bread flour offers a satisfying texture.
00 Flour: The Italian Tradition
00 flour is finely milled. It’s the traditional choice for Italian pizzas. Known for its smooth texture. It creates a tender, crisp crust. A favorite for Neapolitan-style pizzas. 00 flour requires high heat for best results.
Whole Wheat Flour: A Healthier Option
Whole wheat flour adds a nutty flavor. It has more fiber and nutrients. This flour results in a denser crust. Mixing with all-purpose flour can balance texture. It’s a great choice for a hearty, healthy pizza.
Gluten-free Flour: For Dietary Needs
Gluten-free flour caters to dietary restrictions. These blends often combine various grains. They aim to mimic traditional flour textures. Results can vary, so experiment is key. Essential for those avoiding gluten.
The Role Of Yeast
Yeast plays a crucial role in pizza dough, making it rise and creating a light, airy texture. It ferments the dough, developing rich flavors that enhance the overall taste. Perfect for achieving the ideal crust in any homemade pizza recipe.
When crafting the perfect pizza dough, yeast is the unsung hero. It’s the magical ingredient that transforms a simple mix of flour, water, and salt into a delightful, chewy crust. But what exactly does yeast do, and how can you harness its power for the best results?
The Science Behind Yeast
Yeast is a living organism. When you add it to your dough, it starts to ferment. This process produces carbon dioxide, which creates tiny bubbles in the dough, making it rise.
Choosing The Right Yeast
Different types of yeast can affect your dough. Active dry yeast is the most common choice for home bakers. It’s convenient and has a good shelf life. Instant yeast is another option; it doesn’t need to be dissolved in water first, saving you a step.
How Much Yeast To Use?
The amount of yeast can vary depending on your recipe. A small amount can lead to a slow rise, which is perfect for developing flavor. More yeast will speed up the process if you’re short on time. Start with about a teaspoon per cup of flour for a basic recipe.
Proofing: A Crucial Step
Proofing activates the yeast. Mix it with warm water and a pinch of sugar. If it bubbles after a few minutes, it’s ready to work its magic. If not, your yeast might be expired, and you’ll need to start over.
Temperature Matters
Yeast thrives in a warm environment. Keep your dough in a cozy spot to rise, away from drafts. Too much heat can kill the yeast, while cold can slow it down significantly.
Personal Tip: Don’t Rush The Rise
I’ve learned patience is key with pizza dough. Letting the dough rise slowly in the fridge overnight can enhance the flavor. It’s a small step that makes a big difference.
Why Experiment With Yeast?
Experimenting with yeast can be fun. You can adjust the amount or try different types to see how it changes your dough. What have you found when trying different yeasts or rise times? Yeast is more than just an ingredient; it’s a game-changer for your pizza. Understanding its role can transform your homemade pizza into a masterpiece. What will you try with your next batch of dough?
Optimal Water Temperature
Creating the perfect pizza dough is an art, and the secret lies in the details. One crucial element often overlooked is the water temperature. How does the temperature of water affect your dough? It can be the difference between a chewy crust and a tough one. Understanding the optimal water temperature can elevate your pizza-making game.
Optimal Water Temperature: The Key To Perfect Dough
Water temperature plays a pivotal role in activating the yeast. If the water is too cold, the yeast won’t bloom effectively. This results in a dough that lacks rise and flavor. On the other hand, too hot water can kill the yeast, leaving you with a dense, flat crust.
So, what’s the magic number? Aim for a water temperature between 100°F and 110°F (about 37°C to 43°C). This range is warm enough to activate the yeast without compromising its health. You can easily measure this with a kitchen thermometer, ensuring precision in your baking process.
Think of it like waking up on a sunny morning; the warmth encourages the yeast to stretch and grow, similar to how you might feel energized on a bright day. This little tweak in your routine can transform your dough from ordinary to extraordinary.
Tips For Achieving The Right Water Temperature
How can you consistently hit that sweet spot of 100°F to 110°F? Use the warm water from your tap and mix it with a touch of cold water until you reach the desired temperature. It might take a few tries to get it right, but practice makes perfect.
- Check the water temperature with a thermometer for accuracy.
- If you don’t have a thermometer, test it with your wrist; it should feel comfortably warm.
- Consider the ambient temperature; adjust the water temperature slightly if your kitchen is particularly cold or hot.
Have you ever thought about how a small change can make a big impact? Adjusting the water temperature is a simple step that can lead to a noticeable improvement in your pizza dough.
Personal Experience: Trial And Error
I remember my first attempt at making pizza dough. I ignored the water temperature and ended up with a crust that was more akin to cardboard than pizza. It was a humbling experience but taught me the importance of this detail.
After adjusting the water temperature, my dough transformed. It rose beautifully, and the crust was airy and delicious. This small change truly made a difference. Have you ever had a lightbulb moment that changed your cooking forever?
By focusing on the optimal water temperature, you can enhance the quality of your pizza dough. This approach is practical, easy, and impactful. Next time you make pizza, consider how this simple step can improve your results. What other small tweaks could you try to perfect your culinary creations?
Mixing And Kneading Techniques
Mastering mixing and kneading techniques is essential for the best pizza dough recipe. Gently mix ingredients until combined, then knead until smooth and elastic. This process ensures a perfect texture, making your homemade pizza delicious when baked in the oven.
Mixing and kneading are crucial steps in making pizza dough. The right techniques ensure a chewy crust and perfect texture. Understanding these methods can elevate your pizza to new heights. Let’s dive into the secrets of mixing and kneading pizza dough.
Understanding Proper Mixing
Mixing ingredients evenly is key. Begin with flour, yeast, salt, and water. Combine them in a large bowl. Stir until the mixture forms a rough dough. Use a wooden spoon for better control. Ensure all ingredients are well-integrated. This helps the yeast activate fully.
Choosing The Right Tools
Select the right tools for mixing and kneading. A stand mixer can save time. Use the dough hook attachment. It mimics hand kneading. For traditionalists, hands are best. Feel the texture as you work. This connection is vital.
The Art Of Kneading
Kneading develops gluten. Gluten gives dough its elasticity. Stretch and fold the dough repeatedly. Use the heel of your hand. Push the dough forward. Then fold it back onto itself. Rotate and repeat for 10 minutes. The dough should be smooth and springy.
Monitoring Dough Consistency
Check the dough’s consistency. It should be slightly sticky, not too dry. Adjust with water or flour as needed. A balanced dough is crucial. It affects the final bake. Trust your instincts here.
Resting The Dough
Allow the dough to rest. This is known as proofing. Cover with a damp cloth. Let it sit for at least an hour. The dough will rise and double in size. Resting enhances flavors and texture. It’s a necessary step for great pizza. Mixing and kneading are the foundation of your pizza dough. Mastering these techniques promises delicious homemade pizza every time.
Resting And Rising The Dough
Letting the dough rest and rise is crucial for perfect pizza. It helps the dough become airy and stretchy. This step ensures a light, crispy crust when baked in the oven.
Resting and rising the dough is a crucial step in making the perfect pizza dough for your oven. This process allows the dough to develop flavor, texture, and elasticity, making your pizza crust light and chewy. It’s like giving your dough a moment to breathe and gather its strength before it transforms into a delicious base for your toppings.
Why Resting The Dough Matters
Resting the dough isn’t just about waiting. It’s an essential part of the process that lets the gluten relax, making the dough easier to stretch and shape. Ever tried rolling out dough only for it to stubbornly shrink back? That’s what happens when it hasn’t rested enough. Giving your dough time to rest also enhances the flavor. As it sits, the yeast ferments the sugars in the flour, creating a deeper, more complex taste. So, if you want a crust that’s not just a backdrop but a flavor star on its own, don’t skip this step.
How Long Should Your Dough Rise?
The ideal rising time can vary based on your environment. If your kitchen is warm, the dough may double in size in about an hour. In cooler spaces, it might take closer to two hours. To check if it’s ready, gently press the dough with your finger. If the indentation stays, your dough has risen enough. This simple test helps ensure you achieve the perfect airy texture.
Where To Let Your Dough Rise
Finding the right spot for your dough to rise can make a difference. A draft-free corner of your kitchen is ideal. Some bakers even use their oven (turned off!) as a rising chamber, which provides a controlled environment. Cover the dough with a damp cloth or plastic wrap to prevent it from drying out. This little trick keeps the dough moist and ready for action when it’s time to bake.
Personal Insights On Dough Rising
I remember my first pizza-making attempt; I was impatient and skipped the resting phase. The result was a tough, chewy crust that was hard to enjoy. Once I started allowing my dough to rise properly, the transformation was incredible. The crust became a delightful balance of crispiness and softness. Have you ever had a pizza crust that was more memorable than the toppings? That’s the magic of a well-rested dough.
Can You Over-rise Dough?
Yes, dough can rise too much. If left too long, it can collapse and lose its structure. This results in a dense, less appealing crust. Keep an eye on your dough, and don’t let it go beyond doubling in size. A little vigilance can save your pizza night from disappointment.
Quick Tips For Busy Schedules
Pressed for time? You can prepare your dough a day ahead and let it rise slowly in the refrigerator. This method not only fits into busy schedules but also enhances the flavor. Just remember to bring it back to room temperature before shaping. This ensures the dough is pliable and ready for your culinary creativity. Engaging with the dough in these careful steps can turn your pizza-making into a rewarding experience. Have you tried these techniques with your own dough? The difference might just surprise you.
Shaping The Pizza Crust
Shaping the pizza crust is an essential step in crafting the perfect pie. It affects the texture, flavor, and overall enjoyment of your pizza. A well-shaped crust holds the toppings and provides a delightful crunch or chew. In this section, learn how to shape the perfect pizza crust for your oven-baked delight.
Choosing The Right Surface
Use a clean, flat surface like a countertop or large cutting board. Sprinkle flour to prevent sticking. The right surface helps in easy dough handling.
Starting With The Dough Ball
Begin with a dough ball. Gently press it into a flat disk. Keep the thickness even for a balanced crust.
Stretching The Dough
Use your fingers to stretch the dough. Work from the center towards the edges. Avoid tearing by being gentle.
Forming The Crust Edge
Create a thicker edge for the crust. Pinch or fold the dough’s outer edge. This forms a nice border for your pizza.
Checking For Uniform Thickness
Ensure the dough has uniform thickness. This prevents uneven cooking. Adjust by gently stretching or pressing as needed.
Handling The Dough With Care
Handle the dough gently to keep air bubbles. These bubbles add lightness to your crust. Avoid pressing too hard.
Letting The Dough Rest
Allow the dough to rest after shaping. This relaxes the gluten. Resting improves texture and flavor.
Prepping Your Oven
Creating the perfect pizza dough is only half the battle; the other half is mastering your oven. A properly prepared oven can elevate your homemade pizza from ordinary to extraordinary. Let’s dive into some essential steps to ensure your oven is ready for the perfect bake.
Preheat Your Oven
Always preheat your oven to the right temperature before baking. Most home ovens need about 20 minutes to reach the desired heat. Set it to 475°F (245°C) for a crispy crust.
Consider using an oven thermometer to guarantee accuracy. Oven dials can sometimes be misleading. This small step can make a big difference in your pizza’s texture.
Use A Pizza Stone Or Steel
A pizza stone or steel is a game-changer. It helps distribute heat evenly, ensuring a perfectly baked crust. Place it in the oven during preheating.
Make sure it’s positioned on the middle rack. This placement allows the dough to cook evenly, preventing a soggy middle.
Consider Your Oven Type
Different ovens require slightly different approaches. If you have a convection oven, use the fan setting for even heat distribution.
For traditional ovens, rotate your pizza halfway through the baking process. This helps achieve uniform browning and prevents overcooking one side.
Adjust Timing Based On Toppings
Heavy toppings might need a longer bake time. Keep an eye on your pizza and adjust as needed. A simple cheese pizza might take 10 minutes, while a loaded supreme could need up to 15.
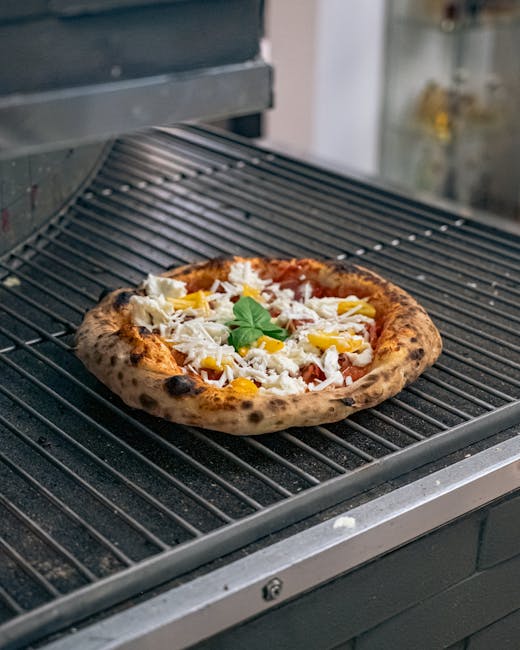
Use the visual cues: bubbling cheese and a golden crust are good indicators that your pizza is ready. Trust your instincts.
Optimize Your Oven Settings
Many ovens have special pizza or bake settings. Experiment with these to find what works best for your dough.
Don’t hesitate to tweak settings like broil for a minute at the end for a bubbly, browned topping. It’s all about finding what suits your taste.
Preparing your oven might seem like a minor detail, but it’s crucial for achieving the best homemade pizza. Have you ever found a surprising trick that improved your pizza-making experience?
Cooking Tips For Perfect Crust
Creating the perfect pizza crust at home can be an art. With the right tips, your homemade pizza can rival any pizzeria. This section focuses on key cooking techniques for a flawless crust.
Preheat Your Oven
Always start with a hot oven. A hotter oven helps achieve a crispy crust. Preheat for at least 20 minutes before baking.
Use A Pizza Stone Or Steel
A pizza stone or steel can make a big difference. They distribute heat evenly, which leads to a better crust texture.
Thin Dough For Crunch
Roll your dough thin for a crunchy crust. A thin crust cooks faster and crisps up nicely.
Don’t Overload With Toppings
Too many toppings can weigh down the crust. Keep it simple for a more balanced bite.
Brush The Edges With Olive Oil
Brush olive oil on the edges for extra flavor and golden color. It enhances the crust’s appearance and taste.
Use High-quality Flour
Choose high-quality flour for your dough. Better flour improves the dough’s texture and taste.
Let Dough Rise Properly
Allow enough time for the dough to rise. Proper rising leads to a chewy and flavorful crust.
Watch The Baking Time
Monitor the baking time closely. Over-baking can dry out the crust, while under-baking leaves it doughy.
Troubleshooting Common Dough Issues
Creating the perfect pizza dough can be challenging. Many home cooks face issues that can ruin a delicious pizza. This section will address common dough problems and provide simple solutions. Understanding these tips will help you make restaurant-quality pizza at home.
1. Dough Not Rising
If your dough isn’t rising, the yeast might be inactive. Check the expiration date on your yeast. Use warm water to activate it. Water that’s too hot can kill the yeast. Ensure your dough rests in a warm place. A cold environment slows down the rising process.
2. Dough Too Sticky
Sticky dough can be difficult to handle. Use flour to dust your hands and work surface. Adding a small amount of flour to the dough helps too. But don’t add too much, or the dough becomes tough. Knead the dough well to improve its texture.
3. Dough Too Dry
A dry dough can crack and break. Add a little water to soften it. Knead the dough to mix in the water evenly. If needed, add a teaspoon of olive oil. This helps in softening the dough further.
4. Dough Tearing Easily
Tearing dough can ruin your pizza base. Let it rest if it’s hard to stretch. Resting helps the gluten relax. Use gentle stretching motions to avoid tearing.
5. Dough Tastes Bland
Bland dough lacks flavor. Ensure you add enough salt during preparation. Salt enhances the taste of the dough. Let the dough ferment longer for a richer flavor.
Frequently Asked Questions
What Is The Secret To Good Pizza Dough?
Use high-quality flour and the right yeast. Knead the dough thoroughly for elasticity. Allow ample time for fermentation. Maintain a consistent, warm environment for rising. Always bake on a hot surface for a crispy crust.
What Is The 55 Rule For Pizza?
The 55 rule for pizza suggests baking pizza at 550°F for 5 minutes. This ensures a crispy crust and perfectly melted cheese. Using a preheated pizza stone enhances the outcome, delivering restaurant-quality pizza at home. Adjust baking time for thicker crusts as needed.
How Does Gordon Ramsay Make The Perfect Pizza Dough?
Gordon Ramsay makes perfect pizza dough by mixing flour, yeast, salt, sugar, and olive oil. He kneads the dough until smooth, lets it rise, and then rolls it out. For flavor, he recommends adding fresh herbs. This technique ensures a crispy crust and delicious taste.
How To Get Good Pizza Crust In The Oven?
Use high heat, around 475°F (245°C), for a crispy crust. Preheat the oven and use a pizza stone. Stretch dough evenly. Add toppings sparingly to avoid sogginess. Bake until golden brown.
Conclusion
Creating pizza dough at home is simple and rewarding. With this recipe, enjoy a crispy crust every time. No more store-bought dough needed. Just gather your ingredients and start kneading. Your taste buds will thank you. Family and friends will love your homemade pizza.
Experiment with toppings for endless fun. Baking pizza at home saves money too. Share this dough recipe with fellow pizza lovers. They will appreciate it. Now, it’s time to preheat the oven. Let the delicious aroma fill your kitchen. Enjoy your pizza night with loved ones.
Happy baking!