Affiliate Disclosure: This post may contain affiliate links. If you purchase through links on our site, we may earn an affiliate commission at no extra cost to you.
Imagine serving perfectly cooked chicken thighs at your next dinner. Crispy on the outside, juicy on the inside, and bursting with flavor—sounds delightful, right?
If you’ve ever wondered why your chicken thighs don’t turn out quite like the ones you see in cooking shows, you’re not alone. The secret often lies in the oven setting. Choosing the right oven setting can transform a simple dish into a culinary masterpiece.
It’s the key to achieving that mouthwatering balance of crispiness and tenderness. Whether you’re a seasoned cook or just starting out, mastering this can elevate your cooking game. In this post, we’ll uncover the best oven settings to make your chicken thighs irresistible. You’ll find easy tips and tricks to ensure every bite is perfection. Stick around, because once you know these secrets, your kitchen will never be the same.
Credit: iowagirleats.com
Choosing The Right Oven Temperature
Selecting the right oven temperature ensures juicy chicken thighs. For tender results, set the oven to 375°F. This temperature cooks evenly, enhancing flavor while keeping the meat moist.
Choosing the right oven temperature is crucial for perfectly cooked chicken thighs. Temperature affects not only the texture but also the flavor and juiciness of your dish. A lot of people overlook this step, assuming the oven will work its magic no matter the setting. However, getting this right can elevate your cooking from good to great.
Understanding Temperature Basics
Chicken thighs are more forgiving than breast meat. They contain more fat, which helps keep them juicy. However, cooking them at too high a temperature can dry them out. A moderate heat is usually best for tender, flavorful thighs.
Best Temperature For Roasting
Roasting chicken thighs at 375°F (190°C) offers a balanced approach. This temperature allows for even cooking throughout. The skin becomes crispy, while the meat remains tender and juicy. If you’re in a hurry, bumping it up to 400°F (204°C) will cook them faster but requires careful monitoring to avoid drying out.
Low And Slow For Tender Results
Cooking at a lower temperature, like 325°F (163°C), can also yield excellent results. The slow cooking time allows the fat to render perfectly, making the meat incredibly tender. This method is ideal if you’re planning a meal while multitasking, as it requires less frequent checking.
Testing For Doneness
While temperature settings are important, knowing when your chicken is done is crucial. A meat thermometer is your best friend here. Aim for an internal temperature of 165°F (74°C). This ensures the meat is safe to eat and still juicy.
Making Adjustments For Different Ovens
Not all ovens are created equal. Some may run hotter or cooler than others. It’s helpful to know your oven’s quirks. Consider using an oven thermometer to verify actual temperature settings. This small step can make a big difference in your cooking results. Making the right temperature choice for chicken thighs can make all the difference. Have you noticed how the temperature affects your cooking? Experiment with these guidelines to find what works best in your kitchen.
Baking Vs. Roasting
Choose roasting for crispy chicken thighs; it uses high heat for a golden finish. Baking works well for tender, juicy meat, using moderate heat. Each method enhances flavor, depending on your preference.
When it comes to cooking chicken thighs, the oven setting can make all the difference. Baking and roasting are two popular methods, each offering unique benefits. Understanding these techniques can elevate your cooking game and ensure perfectly cooked chicken thighs every time.
Baking: The Gentle Approach
Baking involves cooking food at a moderate temperature. This method is excellent for preserving moisture. If you prefer juicy and tender chicken thighs, baking is your go-to option. Set your oven to 350°F (175°C) for baking. This temperature allows the meat to cook evenly without drying out. Adding a marinade or seasoning before baking can enhance flavor without overpowering the dish.
Roasting: The Bold Flavor Enhancer
Roasting typically happens at a higher temperature than baking. It’s perfect for achieving crispy skin and a more intense flavor profile. If you love a bit of crunch on your chicken thighs, roasting is the way to go. Crank up the oven to 425°F (220°C) for roasting. This high heat renders the fat and crisps up the skin beautifully. Consider using a roasting pan to allow air circulation, ensuring even cooking.
Which Method To Choose?
The choice between baking and roasting depends on your preferences. Do you crave juicy, tender meat or delight in crispy skin and bold flavors? Think about the side dishes you’ll serve. Roasted vegetables pair well with roasted chicken thighs, while a creamy mashed potato can complement baked ones.
Practical Tips For Success
Use a meat thermometer to check the internal temperature. Aim for 165°F (74°C) to ensure your chicken is fully cooked. Consider experimenting with herbs and spices. A sprinkle of rosemary or a dash of paprika can transform your dish.
Personal Experience: The Best Of Both Worlds
I once hosted a dinner with friends, unsure whether to bake or roast the chicken thighs. I decided to bake first, then finish with a quick roast. The result was both juicy and crispy, earning rave reviews from everyone. Why not try this hybrid method yourself? You might discover a new favorite way to prepare chicken thighs.
Importance Of Preheating
Preheating the oven ensures even cooking and crispy skin for chicken thighs. Achieve perfect results with consistent temperature control. Optimal settings enhance flavor while preventing dryness.
Preheating your oven is a crucial step that often gets overlooked when cooking chicken thighs. It might seem like a minor detail, but it significantly impacts the taste and texture of your dish. If you’ve ever wondered why your chicken thighs aren’t as crispy or juicy as you’d like, the answer might lie in your preheating routine.
Why Preheat?
Preheating ensures your oven reaches the desired temperature before you place the chicken thighs inside. This helps in cooking them evenly and achieving the perfect texture. If the oven is not hot enough, the thighs can cook slowly, leading to dry and chewy meat.
The Science Behind Preheating
A preheated oven provides consistent heat from the get-go. This consistency prevents the chicken from sticking to the pan and encourages a beautiful golden-brown crust. A cold oven can cause the thighs to cook unevenly, leaving some parts undercooked and others overdone.
A Personal Experience
I once skipped preheating, thinking it wouldn’t make much difference. The result was disappointing—bland and unevenly cooked chicken. It taught me a valuable lesson: patience in preheating can transform your meal from average to exceptional.
Practical Tips For Preheating
– Set your oven to the correct temperature: Usually, 400°F (200°C) is ideal for chicken thighs. This ensures they are crispy on the outside and juicy inside. – Wait for the beep: Most modern ovens signal when they’re ready. Trust this process rather than rushing. – Use an oven thermometer: Ovens can sometimes be inaccurate. A thermometer will give you peace of mind that your oven is truly at the right temperature.
What Happens If You Skip Preheating?
Think about this: would you start frying in a cold pan? The same logic applies here. Skipping preheating can result in soggy skin and uneven cooking. Are you willing to compromise on taste and texture for a few saved minutes?
Engage Your Culinary Creativity
Next time you cook, consider how preheating can enhance your dish. It’s not just a mundane step; it’s an opportunity to elevate your cooking game. How can you make preheating a part of your routine? Embrace the importance of preheating. It’s a small step with big rewards that can make your chicken thighs the star of your meal.
Preparing The Chicken Thighs
Set the oven to 400°F for perfect chicken thighs. This temperature ensures crispy skin and juicy meat. Bake for 35-40 minutes, checking for a golden brown finish.
Preparing chicken thighs for the oven is an art. This process ensures the meat remains juicy and flavorful. Taking time to prepare them can make a significant difference. Here, we explore the essential steps to get the best results.
Trimming And Seasoning
Start by trimming excess fat. This prevents unwanted grease. Use a sharp knife for precision. Focus on removing only the unwanted parts. Next, season the thighs generously. Salt and pepper are basic. They enhance the natural taste. Feel free to add herbs. Rosemary or thyme work well. A sprinkle of garlic powder adds depth.
Marination Techniques
Marination is key for flavor infusion. A basic marinade can be olive oil and lemon juice. Add minced garlic for a punch. Allow the chicken to soak for at least 30 minutes. Overnight marination offers deeper flavors. Use a sealed bag or a covered dish. This keeps the marinade concentrated. Rotate the thighs occasionally. Ensure even coating for each piece.
Using A Meat Thermometer
Cooking chicken thighs to perfection can be tricky. They need to be juicy, not dry. A meat thermometer helps achieve this. It ensures the chicken reaches a safe temperature. It also prevents overcooking.
Using a meat thermometer is simple. Insert it into the thickest part of the thigh. Avoid touching the bone. This gives an accurate reading.
Understanding Safe Temperatures
Chicken needs to reach 165°F internally. This temperature kills harmful bacteria. It’s crucial for food safety. The meat thermometer helps confirm this.
Choosing The Right Thermometer
Digital thermometers are precise. They provide quick readings. They are easy to use. Choose one with a clear display. This makes reading temperatures easier.
Checking Temperature During Cooking
Check the temperature near the end of cooking. This prevents opening the oven too often. Opening the oven can lower the temperature inside. Keep the oven closed as much as possible.
Adjusting Oven Settings
If the chicken is not at 165°F, adjust the oven settings. Increase the temperature slightly. This helps reach the desired temperature. Remember, every oven is different. Watch the chicken closely.
Optimal Cooking Time
Understanding the optimal cooking time ensures juicy and tender chicken thighs. Cooking time varies based on the oven setting and thigh size. Getting this right makes all the difference.
Adjusting For Thigh Size
Chicken thighs come in different sizes. Larger thighs need more time. Smaller ones cook faster. Aim for 25-30 minutes at 400°F for medium sizes. Check the internal temperature to ensure doneness. It should reach 165°F.
Using A Thermometer
A thermometer helps achieve perfect results. Insert it into the thickest part of the thigh. Avoid touching the bone for an accurate reading. This ensures the chicken is fully cooked.
Convection Vs. Conventional Ovens
Convection ovens cook faster due to the fan. Reduce cooking time by 5 minutes. Conventional ovens may need longer. Always check the internal temperature.
Resting Time
Resting the chicken allows juices to redistribute. Wait at least 5 minutes before serving. This step enhances flavor and tenderness.
Resting Period For Juiciness
Achieving juicy chicken thighs starts with the right oven setting. Resting them after baking enhances flavor and tenderness. It allows juices to redistribute evenly, ensuring a succulent bite every time.
Resting Period for Juiciness Cooking chicken thighs to perfection involves more than just selecting the right oven settings. One crucial step often overlooked is the resting period. After baking your chicken thighs, allowing them to rest can make a significant difference in juiciness and flavor.
Why Resting Matters
Once your chicken thighs come out of the oven, they’re still cooking internally. If you cut into them immediately, you’ll lose those precious juices. Allowing them to rest for about 5 to 10 minutes helps the juices redistribute throughout the meat, making every bite succulent.
How Long Should You Rest?
Timing is everything. While a 5-minute rest works for smaller thighs, larger ones may benefit from a longer resting period. Consider the size and thickness of your chicken to determine the ideal resting time.
My Personal Experience
I once hurriedly served chicken thighs straight from the oven for a dinner party. The result was dry, disappointing meat. Since then, I’ve always allowed a resting period, and the difference is astonishing. Every guest now marvels at the juiciness of my chicken.
Simple Tips To Enhance Juiciness
– Cover your chicken: Use foil to trap heat and continue the cooking process. – Don’t rush: Be patient; the results are worth the wait. – Test it: Gently press the chicken with a fork; if the juices run clear, it’s ready to serve.
Are You Letting Your Chicken Rest?
Think about your last chicken dish. Was it as juicy as you hoped? If not, consider adding a resting period to your cooking routine. This small change can transform your chicken thighs from ordinary to extraordinary. Resting your chicken thighs is a simple yet effective way to ensure they remain juicy and flavorful. So next time you cook, remember to give your chicken a little time to rest before serving. Your taste buds will thank you!
Oven Rack Position
Positioning the oven rack in the center ensures even cooking for chicken thighs. This setting helps achieve crispy skin and juicy meat. Adjust rack height for variations in browning and texture.
Preparing the perfect chicken thighs can sometimes feel like an art. One crucial aspect that often gets overlooked is the oven rack position. It’s not just about setting the right temperature; where you place your chicken in the oven can significantly affect the outcome. Let’s explore how you can optimize your oven rack position for the best results.
Understanding Oven Rack Levels
Most ovens have multiple rack levels. Each level serves a purpose, affecting how heat interacts with your food. The top rack is closest to the heating element, making it ideal for broiling. The middle rack is perfect for even cooking, while the bottom rack is great for roasting and achieving crispy skin. Think about your desired outcome. Do you want your chicken thighs crispy or evenly cooked? This decision influences your rack choice.
Choosing The Right Rack Position
For juicy, evenly cooked chicken thighs, the middle rack is your best bet. It offers balanced heat distribution, ensuring the thighs cook evenly without burning the skin. This position is a favorite among home cooks for achieving tender meat. If you’re craving that golden, crispy skin, try using the top rack. But be vigilant—it’s easy to overcook. Keep an eye on your chicken to prevent it from getting too crispy.
Personal Experience And Tips
I once placed my chicken thighs on the bottom rack, thinking it would speed up the cooking process. Instead, the thighs ended up overcooked on the outside and undercooked inside. The lesson? The bottom rack is best for larger cuts of meat that need extended cooking times. Always preheat your oven. This ensures the chicken starts cooking immediately, maintaining moisture and flavor. Consider rotating your pan halfway through cooking to promote even browning.
Engage With Your Cooking
Do you experiment with rack positions? Sometimes, changing rack positions mid-cooking can yield surprising results. Moving your chicken from the middle rack to the top can add a final touch of crispiness. What rack position has worked best for you in the past? Sharing experiences can lead to new insights and better cooking outcomes. In the end, oven rack position plays a vital role in cooking chicken thighs. By understanding and utilizing the different levels, you can enhance your culinary skills and enjoy perfectly cooked chicken every time.
Enhancing Flavor With Spices
Achieving perfect chicken thighs requires the right oven setting. A temperature of 400°F ensures crispy skin and juicy meat. Enhance flavor with spices like paprika, garlic powder, and thyme for a delicious twist.
Enhancing the flavor of chicken thighs with spices is like painting on a blank canvas. While oven settings play a crucial role in achieving that perfect texture, it’s the spices that transform a simple dish into a culinary masterpiece. Imagine biting into a juicy chicken thigh where every mouthful bursts with aromatic flavors. This is the magic you can create with the right blend of spices.
Choosing The Right Spices
Selecting spices can make or break your dish. The key is to balance the boldness of flavors. Paprika adds a smoky depth, while garlic powder brings a subtle, aromatic warmth. Do you enjoy a little heat? A dash of cayenne pepper can add a spicy kick that contrasts beautifully with the savory chicken. Experiment with these, and you’ll find your perfect blend.
Marination Techniques
Marinating is your secret weapon for infusing flavors deep into the meat. Try mixing your spices with olive oil or yogurt. This not only helps the spices stick but also tenderizes the meat. Have you ever considered marinating overnight? This technique allows the flavors to penetrate deeply, making every bite a delight.
Timing Is Everything
Spices need time to work their magic. When you sprinkle them just before baking, the flavors may not fully develop. Consider seasoning your chicken thighs a few hours before cooking. This gives the spices a chance to blend and enhance the natural taste of the chicken.
Spice Blends To Try
Creating your own spice blend can be a fun experiment. Try a mix of thyme, rosemary, and lemon zest for a Mediterranean flair. Or, if you’re feeling adventurous, a combination of cumin, turmeric, and ginger can transport you to the bustling streets of India with its vibrant flavors.
Feedback And Adjustments
How do you know if your spice mix is the right one? The best way is to gather feedback from family and friends. Do they love it or suggest changes? Use their feedback to tweak your recipe until it’s just right for your taste buds. Have you discovered a spice blend that elevates your chicken thighs to new heights? Share your experiences, and let others in on your culinary secrets. After all, cooking is not just about following recipes; it’s about creating your own delicious story.
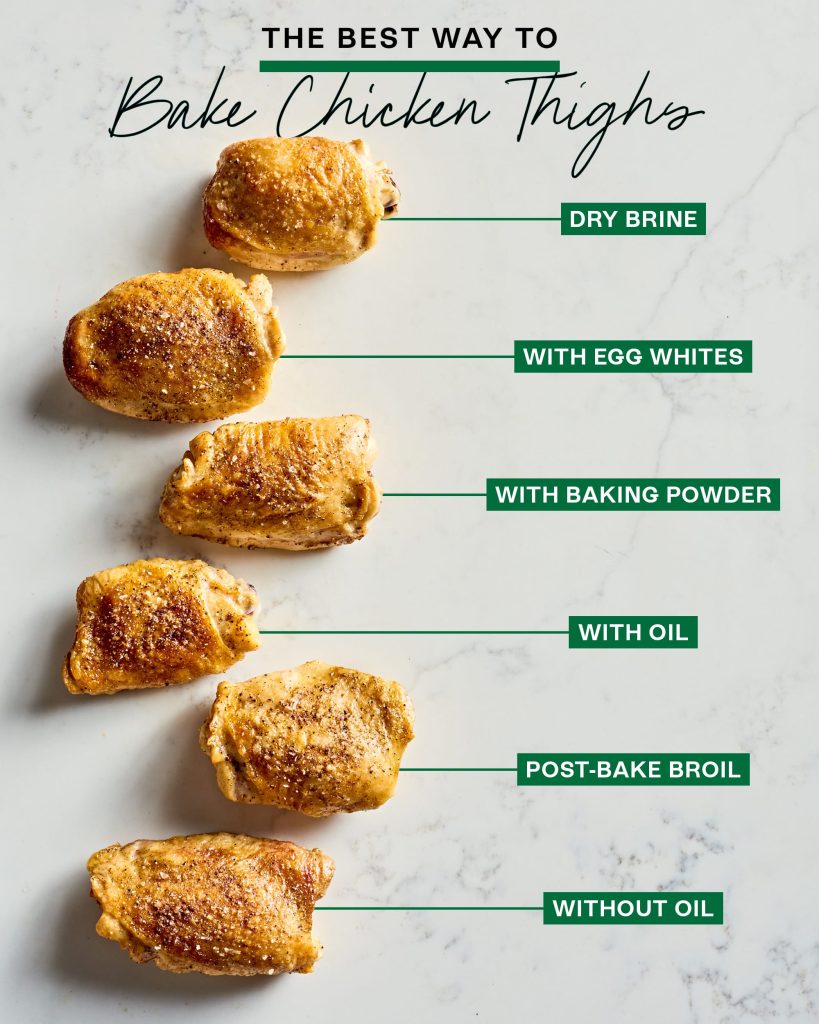
Tips For Crispy Skin
For crispy chicken thigh skin, set the oven to 425°F. Use convection for even heat distribution. High heat helps render fat, creating golden, crunchy skin.
Cooking chicken thighs with crispy skin can be quite the culinary adventure. Achieving that perfect golden crunch is a delightful challenge, but with the right techniques, you can turn your kitchen into a haven of delicious aromas. Let’s dive into some practical tips that will make your chicken thighs irresistibly crispy.
Preheat Your Oven
The journey to crispy chicken skin starts with a well-preheated oven. Set your oven to 425°F (220°C). This high temperature is key to rendering the fat and achieving that coveted crunch.
Pat Dry The Chicken Thighs
Moisture is the enemy of crispy skin. Use paper towels to thoroughly pat dry each chicken thigh. This step ensures that the skin crisps up beautifully, instead of steaming in the oven.
Season Generously
Salt is your best friend here. It not only adds flavor but also draws out moisture from the skin. Sprinkle salt liberally over the chicken thighs, and consider adding pepper, garlic powder, or paprika for extra zing.
Use A Wire Rack
Place your chicken thighs on a wire rack set over a baking sheet. This allows hot air to circulate evenly around the chicken, preventing soggy bottoms and promoting all-around crispiness.
Skin Side Up
Always place the chicken thighs skin side up. This ensures direct exposure to heat, helping the skin to crisp and brown beautifully without sticking to the rack.
Don’t Crowd The Pan
Give each chicken thigh space to breathe. Overcrowding the pan can lead to uneven cooking and soggy skin. Arrange them in a single layer, with space between each piece.
Monitor Cooking Time
Chicken thighs generally take about 35-45 minutes to achieve crispy perfection. Use a meat thermometer to check for doneness. The internal temperature should reach 165°F (75°C).
Rest Before Serving
Let your chicken thighs rest for a few minutes after removing them from the oven. This allows juices to redistribute and skin to firm up, ensuring every bite is juicy and crisp. Are you ready to try these tips and transform your chicken thighs into a crispy masterpiece? What other secrets have you discovered in your quest for the perfect chicken? Share your thoughts and let’s create culinary magic together!
Frequently Asked Questions
What Oven Setting For Chicken Thighs?
Set the oven to 400°F (200°C) for baking chicken thighs. Ensure they’re cooked for 35-45 minutes. Check for an internal temperature of 165°F (74°C) for doneness. Use a baking dish for even cooking. Season as desired before placing in the oven for optimal flavor.
Is It Better To Bake Chicken Thighs At 350 Or 400?
Bake chicken thighs at 400°F for crispy skin and tender meat. Higher heat helps retain moisture and flavor. Ensure even cooking by checking internal temperature reaches 165°F. This method enhances taste and texture, making it a popular choice for delicious baked chicken thighs.
What Cooking Method Is Best For Chicken Thighs?
Grilling or roasting chicken thighs enhance their rich flavor and juicy texture. Use a marinade for extra taste. Sear thighs on a hot grill or oven at 400°F for 25-30 minutes. Ensure internal temperature reaches 165°F for safe consumption. Enjoy tender, flavorful chicken thighs.
How Do You Keep Chicken Thighs From Drying Out In The Oven?
Use bone-in chicken thighs to retain moisture. Marinate them for flavor. Bake at a moderate temperature. Cover them with foil. Let them rest after cooking for juicy results.
Conclusion
Choosing the right oven setting makes chicken thighs delicious. A balanced heat ensures juicy meat and crispy skin. Experiment with temperatures and times. Discover what works best for your taste. Remember to preheat the oven for even cooking. Check internal temperature for safety.
Chicken thighs should reach 165°F. Try seasoning for extra flavor. Enjoy your perfectly cooked chicken thighs with family. A simple meal can bring joy to your table. Practice and patience lead to perfect results. Happy cooking!