Affiliate Disclosure: This post may contain affiliate links. If you purchase through links on our site, we may earn an affiliate commission at no extra cost to you.
Craving the tender, mouthwatering goodness of St Louis ribs but don’t want to fire up the grill? You’re in luck!
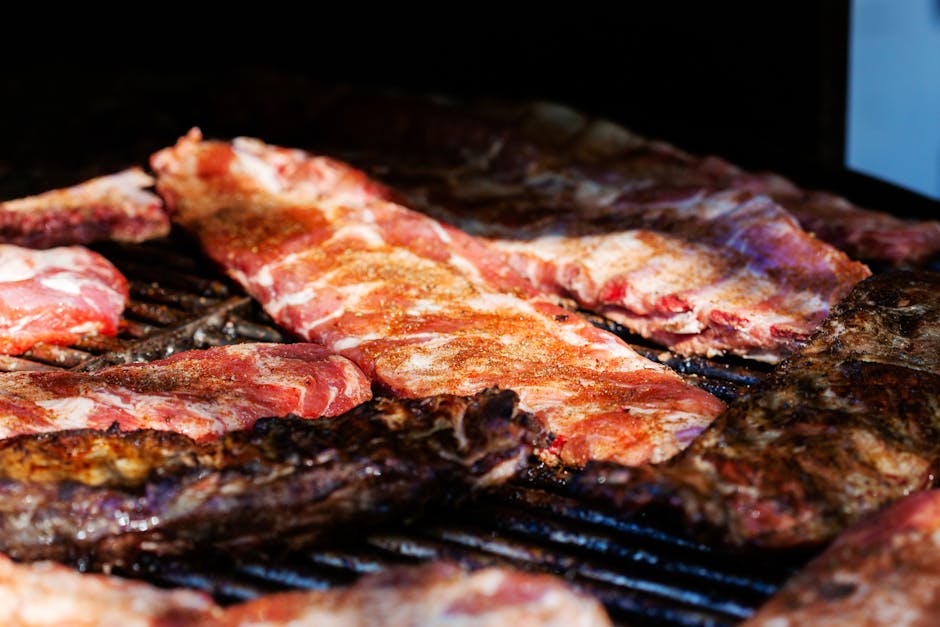
Discovering the best recipe for St Louis ribs in the oven is about to change your culinary game. Imagine sinking your teeth into perfectly cooked ribs with a caramelized crust and juicy, flavorful meat that slides right off the bone.
Yes, it’s possible in your very own kitchen. You might be wondering how to achieve that irresistible taste without the BBQ hassle. The secret lies in a few simple steps and ingredients that you probably already have at home. Ready to transform your next meal into a finger-licking feast? Keep reading, because this recipe is going to be your new go-to for impressing family and friends with minimal effort.
Selecting The Perfect Ribs
Selecting the perfect ribs ensures the best recipe for St Louis ribs in the oven. Choose meaty ribs with good marbling and even thickness for a tender, delicious result.
Selecting the perfect ribs can make or break your St. Louis ribs experience. It’s not just about picking any slab of ribs; it’s about choosing the right ones that will give you the best flavor and tenderness. Trust me, I’ve learned this the hard way after a few less-than-stellar attempts. Let’s dive into what you need to know to make the best choice for your oven-baked ribs.
Choosing Quality Meat
When you’re at the butcher or browsing the meat section, focus on the color and marbling of the ribs. Look for ribs that have a nice pinkish-red color, indicating freshness. Marbling, or the little streaks of fat within the meat, is your friend. This fat will melt during cooking, keeping your ribs juicy and flavorful. Don’t hesitate to ask your butcher questions. They’re there to help, and they might even share a few secret tips on what to look for!
Understanding Rib Cuts
Not all ribs are created equal. St. Louis ribs are a specific cut from the belly area, known for their uniform shape and balance of meat and bone. They differ from baby back ribs, which are smaller and taken from the back of the pig. St. Louis ribs offer more meat and fat, making them ideal for oven cooking. If you’re new to cooking ribs, think about what you enjoy more—meatier bites or smaller, leaner ones. This can guide your choice between different cuts. Have you ever compared different rib cuts side by side? It’s an eye-opener and can change your rib game forever.
Essential Ingredients
Cooking St Louis ribs in the oven transforms a simple dish into a feast. The magic lies in the essential ingredients. To ensure tenderness and flavor, you need to choose wisely.
Spices And Seasonings
Spices elevate the taste of your ribs. Paprika is a must for a smoky flavor. Garlic powder adds depth to the taste. Black pepper brings a subtle heat. Salt enhances all other spices. Onion powder complements the garlic, providing a balanced flavor. Brown sugar introduces sweetness, creating a harmonious blend.
Sauce Selection
Choosing the right sauce can make a difference. Barbecue sauce is a popular choice. It offers a rich, tangy flavor. Honey barbecue sauce adds sweetness. Spicy sauce caters to heat lovers. You can mix sauces for a unique taste. Choose a sauce based on your preference.
Preparing The Ribs
Prepare delicious St. Louis ribs in the oven by seasoning with your favorite spices. Bake slowly for tender, juicy results. Finish with a tangy sauce for a mouthwatering flavor.
Preparing the ribs for a mouthwatering oven-baked St Louis rib experience is an art in itself. It’s the foundational step that can elevate your dish from good to unforgettable. Whether you are new to cooking ribs or have grilled them a hundred times, the preparation phase requires attention to detail and a bit of patience.
Trimming Excess Fat
Start by placing the ribs on a clean cutting board. Look closely and you’ll notice some thick white fat on the surface. Removing this excess fat is crucial to prevent greasiness. Use a sharp knife and carefully trim away the fat, leaving a thin layer for flavor. This step ensures that the ribs cook evenly and the seasoning penetrates effectively. Have you ever noticed how some ribs just melt in your mouth? Trimming fat is a secret to achieving that tenderness.
Removing The Membrane
This is a step often skipped, but removing the membrane makes a big difference. Turn the ribs bone side up, and you’ll see a thin, shiny layer covering them. Using a butter knife, slide under the membrane at one end, loosening it enough to grip. With a paper towel for better hold, pull the membrane off in one piece. Why bother with this extra step? Removing the membrane allows the flavors to penetrate the ribs more deeply and makes them easier to chew. Have you ever found ribs that are hard to bite into? This simple action can change that experience completely. By meticulously preparing the ribs, you set the stage for a delicious meal. Each step, though small, adds up to create ribs that are tender, flavorful, and utterly satisfying. Are you ready to take your rib-cooking skills to the next level? Give these preparation tips a try and taste the difference yourself.
Creating The Dry Rub
Crafting the perfect dry rub enhances the flavor of St. Louis ribs cooked in the oven. Combine brown sugar, salt, paprika, and garlic powder for a rich taste. Add a hint of cayenne for a spicy kick. Massage into ribs for a deliciously seasoned meal.
Creating the perfect dry rub for St Louis ribs is an art in itself. It’s where you set the stage for flavors that will tantalize your taste buds and elevate your ribs to new heights. It’s a simple yet crucial step that can make all the difference in your rib-cooking journey. Have you ever wondered what makes a dry rub truly unforgettable?
Balancing Flavors
Balancing flavors is your ticket to a memorable dry rub. Start with the basics: salt and pepper. These two staples are your foundation, adding depth and enhancing the natural taste of the ribs. From there, think about adding sweetness with brown sugar. It caramelizes beautifully, creating a delicious crust. For a hint of heat, consider cayenne or chili powder. These spices add a kick without overpowering the other flavors. Each ingredient plays a role; too much of one can throw off the harmony. Have you found a mix that strikes the perfect balance?
Applying The Rub
Applying the rub is where the magic happens. Generously coat each rib, ensuring every inch is covered. The rub acts like a flavorful shield, ready to infuse your ribs with taste. Massage the rub into the meat using your fingers. This helps the spices penetrate deeply, allowing the flavors to meld into the ribs as they cook. Don’t rush this step. Spend a few extra minutes ensuring the rub is evenly distributed. Do you take your time to savor this process, knowing it will enhance the final result? Creating the dry rub might seem simple, but it’s a process worth savoring. It’s where your personal touch shines through and your ribs begin their journey to perfection.
Marinating For Maximum Flavor
When you crave juicy, flavorful St. Louis ribs made in the oven, marinating is your secret weapon. Marinating ribs not only infuses them with flavor but also tenderizes the meat, making each bite irresistible. Imagine the aroma wafting from your kitchen as the ribs soak up a mixture of spices and sauces overnight. The anticipation builds, knowing that each hour spent marinating contributes to the rich, succulent taste that awaits you.
Time Considerations
How long should you marinate your ribs for optimal flavor? The sweet spot is typically between 6 to 24 hours. Short on time? Marinate for at least 6 hours to give the ribs a chance to soak up the flavors. If you plan ahead, let them marinate overnight. The longer marinating time allows the spices to penetrate deeper into the meat. This results in a more flavorful and tender bite.
Consider your schedule and taste preferences when deciding. What’s more important to you: convenience or maximum flavor?
Refrigeration Tips
Keeping your marinated ribs in the fridge is crucial for safety and flavor enhancement. Use a large resealable plastic bag or a covered container to store your ribs. Ensure the marinade covers the ribs completely, turning them occasionally to distribute the flavor evenly.
What’s the best way to prevent spills and leaks? Double bagging the ribs is a simple hack that works wonders. This also helps keep your fridge clean and odor-free.
Have you ever had a marinade mishap in the fridge? Avoid common pitfalls by checking for any tears or weak spots in the bag. A little caution now saves a lot of cleanup later.
Ready to take your ribs to the next level? Marinating is the step that transforms good ribs into unforgettable ones.
Setting Up The Oven
Start by preheating the oven to a low temperature to ensure tender St Louis ribs. Arrange the ribs on a baking sheet, allowing space for even cooking. This setup is key to achieving mouthwatering results.
Setting up your oven is crucial to cooking the perfect St. Louis ribs. A slight tweak in temperature or positioning can make a world of difference. If you ever wondered why your ribs aren’t as tender and juicy as you’d like, the answer might just lie in how you prepare your oven. Let’s dive into the details to ensure your ribs come out perfect every time.
Temperature Settings
Getting the right temperature is key. Preheat your oven to 275°F. This low and slow approach helps break down the fat and connective tissues, resulting in fall-off-the-bone goodness. Avoid the temptation to increase the temperature for faster results. Higher heat can dry out the ribs, leaving you disappointed. Consistency is your friend here, so use an oven thermometer to ensure accuracy.
Positioning The Ribs
Positioning is more than just placing the ribs on a rack. Use a baking sheet lined with aluminum foil to catch drippings. This not only makes for easy cleanup but also creates a humid environment that keeps your ribs moist. Place the ribs on a wire rack above the baking sheet. This allows air to circulate around the meat, ensuring even cooking. Have you ever tried flipping them halfway through? It can help achieve that perfect texture on both sides. Do you use the middle rack? It’s the best spot for even heat distribution. Think about your own oven setup and make adjustments as needed. These small tweaks can elevate your rib game to the next level.
Baking Techniques
Baking St. Louis ribs in the oven brings out their rich flavors. It’s a method that ensures tenderness and a savory finish. Using the right techniques is key. Let’s explore these essential baking steps.
Covering The Ribs
Covering the ribs with foil is crucial. This traps moisture and heat. It helps the ribs cook evenly. Foil acts like a mini oven within your oven. It keeps juices from escaping. This ensures every bite is flavorful. Place ribs on a baking sheet. Wrap them tightly with foil. This step guarantees succulent ribs.
Monitoring Cook Time
Monitoring the cook time is vital. Ribs need slow and steady baking. Too high heat can dry them out. Set your oven to 275°F (135°C). Check the ribs after two hours. They should be tender but not falling apart. Test with a fork to ensure they’re done. If they need more time, bake for another 30 minutes. Perfect ribs require patience and care.
Adding The Sauce
Adding the sauce to your St. Louis ribs is like the grand finale in a symphony—it’s where everything comes together to create a masterpiece. This crucial step can elevate your ribs from good to unforgettable. But when should you add the sauce, and how can you ensure it’s evenly coated? These are the secrets to achieving ribs that will leave your guests craving more.
When To Sauce
Timing is everything when it comes to saucing your ribs. If you add the sauce too early, it might burn before the ribs are fully cooked, leaving a bitter taste. Wait until the last 30 minutes of cooking in the oven to brush on your favorite sauce. This allows the sauce to caramelize perfectly without overwhelming the natural flavors of the meat.
Consider the aroma wafting from the oven as the sauce begins to bubble and meld with the ribs—it’s a sign you’re on the right track. Have you ever found yourself impatiently peeking in the oven, waiting for that perfect moment? Trust that instinct, but remember, patience is your friend.
Techniques For Even Coating
An unevenly sauced rib is like a painting with missed brush strokes—it just doesn’t work. To achieve a uniform coating, use a silicone basting brush. Its flexibility allows you to cover every nook and cranny of your ribs. Dip the brush generously in sauce, then sweep it across the ribs in long, even strokes.
Alternatively, you can use a technique that might surprise you: tossing. Place your ribs in a large bowl, pour the sauce over them, and gently toss until they’re evenly coated. This method works wonders for ensuring that every inch of the rib is covered.
Have you ever tried tossing your ribs and ended up with sauce splattered everywhere? It can be a messy affair but also a fun one. Sometimes the best cooking memories are made with a little chaos.
So, how do you like your ribs—richly coated or just a hint of sauce? It’s your canvas. Paint it as you wish, and let the flavors tell their story.
Finishing Touches
The final touches on your oven-cooked St Louis ribs can make all the difference between good and great. You’ve spent hours perfecting the flavor, but now it’s time to add that irresistible crispness and let the flavors settle. This is your chance to elevate your ribs to restaurant-quality right in your own kitchen.
Broiling For Crispiness
Broiling adds a layer of crispiness that everyone loves. After slow cooking the ribs, set your oven to broil. This high heat will caramelize the sauce, giving it a sticky, sweet texture. Slide the ribs under the broiler for about three to five minutes.
Keep a close eye on them. The broiler can go from perfect to burnt in seconds. You want the edges to be slightly charred and the sauce to bubble. This step transforms the ribs from tender to tantalizingly crispy.
Resting The Ribs
Resting is not just for steaks. Letting your ribs rest for a few minutes after broiling allows juices to redistribute. This step makes the meat juicier and easier to cut. Place them on a cutting board and cover loosely with foil.
During this time, the flavors meld together beautifully. It also gives you a moment to prepare sides or set the table. Did you ever notice how letting food rest can make it taste better? Try slicing into a rested rib, and you’ll see the difference.
Have you ever thought about how these simple finishing steps can elevate your cooking? Next time you’re making ribs, remember that a few extra minutes can turn a dish from ordinary to extraordinary.
Serving Suggestions
Discover the perfect way to serve St Louis ribs from the oven. Pair with tangy coleslaw and crispy fries. Add a side of barbecue sauce for extra flavor.
When you’ve finally perfected the art of making St. Louis ribs in the oven, the next step is to elevate your dining experience with thoughtful serving suggestions. Serving your ribs with complementary sides and a touch of creativity in presentation can transform a simple meal into a memorable feast. Whether you’re hosting a casual family dinner or a lively gathering with friends, the right accompaniments and presentation tips can make all the difference.
Side Dishes
Pairing your St. Louis ribs with the right side dishes is key. Consider serving them with classic coleslaw. Its crisp texture and tangy flavor balance the richness of the ribs beautifully. Another great option is baked beans. Their sweet and savory profile complements the smokiness of the ribs. If you want to add some greens, a simple arugula salad with a lemon vinaigrette can add a refreshing contrast. Do you have a favorite side dish that you think would pair well? Experiment and find the perfect combination that suits your taste.
Presentation Tips
Presentation can enhance the appeal of your dish. Start by arranging the ribs on a large platter for a family-style service. This makes them the star of the show and invites everyone to dig in. Adding a garnish like fresh herbs or a sprinkle of coarse sea salt can add a touch of elegance. Serve the sides in small bowls or dishes around the ribs. This creates a feast-like atmosphere and allows guests to choose their preferences easily. Have you ever noticed how a well-presented dish can heighten the anticipation of a meal? Give your ribs the spotlight they deserve!
Frequently Asked Questions
How Long Should You Cook St. Louis Ribs In The Oven?
Cook St. Louis ribs in the oven at 275°F for 2. 5 to 3 hours. Ensure they reach an internal temperature of 190°F for tenderness. For best results, wrap them in foil during cooking.
What Is The 3 2 1 Method For St Louis Style Ribs?
The 3 2 1 method for St. Louis style ribs involves smoking for 3 hours, wrapping and cooking for 2 hours, and finally unwrapping and saucing for 1 hour. This technique ensures tender, flavorful ribs with a perfect balance of smokiness and caramelization.
What Is The Secret To Making Good Ribs In The Oven?
Start with a flavorful rub for the ribs. Preheat the oven to 300°F. Wrap ribs in foil for moisture. Bake for 2-3 hours until tender. Finish with a glaze or sauce in the final 10 minutes.
What’s The Best Way To Cook St. Louis Spare Ribs?
The best way to cook St. Louis spare ribs is to season them, then slow-cook at 225°F for 3-4 hours. Finish by grilling or broiling for a smoky flavor. This method ensures tender, flavorful ribs. Use a meat thermometer to ensure they reach an internal temperature of 190°F.
Conclusion
St. Louis ribs in the oven make a delicious and easy meal. The marinade adds rich flavor and tenderness. Baking them slowly ensures juicy, flavorful ribs every time. Anyone can enjoy this simple, tasty dish. Perfect for family dinners or casual gatherings.
Enjoy them with your favorite side dishes. Cornbread or coleslaw pairs well. Try this recipe soon and delight in a hearty meal. Share with friends and family. They’ll love the taste of these oven-baked ribs. A satisfying meal without the need for a grill.
Enjoy your cooking experience!