Affiliate Disclosure: This post may contain affiliate links. If you purchase through links on our site, we may earn an affiliate commission at no extra cost to you.
Imagine the perfect pizza: a crispy crust, bubbling cheese, and toppings that burst with flavor. The secret to achieving this culinary masterpiece lies in one crucial step—finding the best oven setting for your pizza.
As you prepare to transform your kitchen into a pizzeria, you might wonder about the magic temperature and time that can turn a simple dough into a slice of heaven. We’ll uncover the secrets to mastering the art of pizza baking right in your own oven.
With easy-to-follow tips and insights, you’ll be able to craft a pizza that will have your taste buds dancing in delight. Whether you’re a seasoned chef or a home cook looking to impress, this guide is your ticket to pizza perfection. So, get ready to explore the techniques that will make your pizza the star of every meal. Your perfect pizza awaits, and the journey to get there starts now!
Choosing The Right Temperature
Choosing the right temperature for baking pizza in the oven is crucial. It affects the taste and texture of your pizza. The temperature you select can change the crust from soft to crispy. Understanding these details helps you make the perfect pizza every time.
Ideal Temperature Range
The ideal temperature range for baking pizza is 475°F to 500°F. This range ensures the pizza cooks evenly and quickly. High heat creates a delicious crust and perfectly melted cheese. Preheating the oven to this range is essential for great results. Using a pizza stone can also improve baking quality.
Impact On Crust Texture
A higher temperature creates a crispier crust. It allows the dough to rise quickly and form air pockets. This results in a light and airy texture. A lower temperature might make the crust softer and less crunchy. Adjusting the temperature lets you customize your pizza experience. Always experiment to find your preferred crust texture.
Preheating The Oven
Making the perfect pizza at home is an art that starts with the right oven settings. One crucial step in this process is preheating your oven. You might wonder why this step is so important. Well, preheating ensures that your pizza bakes evenly and achieves that delightful golden crust. It’s a small effort that can make a big difference in your pizza outcome. Let’s dive into the benefits and timing of preheating your oven.
Benefits Of Preheating
Preheating your oven guarantees that your pizza dough cooks evenly from edge to edge. Without it, your toppings might burn while the base remains undercooked. This step also helps in achieving a crispy crust, essential for a satisfying pizza experience.
Imagine biting into a pizza with a perfectly crisp bottom and gooey cheese on top. Preheating helps you achieve this delicious balance. By starting with a hot oven, you ensure that your pizza cooks quickly and evenly, which is key to preserving the flavors and textures of your ingredients.
Time Required For Optimal Results
The time needed to preheat your oven depends on the type and model. Generally, setting your oven to 475°F (245°C) and waiting for about 20 minutes should do the trick. Always check your oven’s manual for specific guidelines.
Is it worth the wait? Absolutely. Cutting corners by skipping preheating can lead to a disappointing pizza. Investing a little time in preheating ensures your meal is cooked to perfection.
Have you ever noticed how pizzerias always have their ovens running hot and ready? They know the value of a well-preheated oven. Try this at home and see the difference it makes in your homemade pizzas.
So, next time you’re about to make pizza, remember to preheat your oven. It’s a simple step that promises a delicious payoff.
Using A Pizza Stone
Have you ever wondered why restaurant pizzas have that perfect crispy crust while homemade ones often fall flat? The secret might just be using a pizza stone. This magical kitchen tool can transform your pizza-making game, giving you a slice that is both delicious and visually appealing. Let’s dive into why a pizza stone can be your best ally in achieving that perfect pizza.
Advantages Of A Pizza Stone
A pizza stone offers several benefits that make it a worthwhile investment. First, it evenly distributes heat. Unlike a metal pan that heats unevenly, a pizza stone absorbs and retains heat, ensuring your pizza cooks uniformly.
Additionally, the porous surface of the stone draws moisture away from the dough, creating a crispy crust. No more soggy-bottom pizzas! Imagine biting into a slice and hearing that satisfying crunch.
Another advantage is its versatility. You can use it for more than just pizza. Try baking bread or cookies on it for a unique texture. Have you ever tried it?
Proper Usage Techniques
Using a pizza stone might seem daunting at first, but it’s quite simple. Start by placing the stone in your oven while it’s cold. Preheat the oven with the stone inside to avoid cracking it.
Once the stone is hot, carefully transfer your pizza onto it. A pizza peel can be helpful here. Ever experienced the joy of sliding a perfect pizza onto a hot stone?
To keep your stone in good condition, avoid washing it with soap. Instead, scrape off any residue with a spatula after it cools. Do you find cleaning your kitchen tools tedious?
Incorporating a pizza stone into your cooking routine can elevate your homemade pizzas to restaurant quality. Why not give it a try and see the difference for yourself?
Positioning In The Oven
Positioning your pizza in the oven affects its cooking quality. The right placement ensures your pizza is evenly baked. It can make a big difference in texture and flavor. Should you place it on the top or bottom rack? Each position has its own benefits.
Top Vs. Bottom Rack
The top rack is closer to the oven’s heating element. This may result in a crispier crust. But be cautious. The toppings might cook faster than the base. The bottom rack is ideal for a softer crust. It keeps the heat concentrated more on the base. This position ensures a more chewy texture. Each position offers a unique taste experience.
Effects On Cooking Evenness
Even cooking is crucial for the perfect pizza. The middle rack often provides the most balanced heat. It ensures the toppings and crust cook at the same rate. If using the top rack, monitor the pizza closely. The heat can cause uneven cooking if left unchecked. On the bottom rack, the crust cooks well. But the toppings might need extra time. Proper positioning ensures your pizza is cooked just right.
Baking Time Guidelines
Cooking pizza at home can feel like a delightful experiment, but getting the baking time just right is crucial for that perfect crispy crust and bubbling cheese. Understanding the baking time guidelines ensures your pizza emerges from the oven as a masterpiece. Each oven is unique, and various factors influence how long your pizza should bake.
Factors Affecting Baking Time
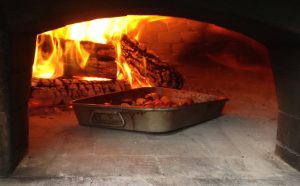
Not all ovens are created equal. The type of oven you have—whether it’s a conventional, convection, or a wood-fired oven—can affect how long your pizza needs to bake. Convection ovens circulate hot air, potentially reducing baking time.
Another factor is the thickness of your pizza crust. Thin crusts cook faster, while thicker crusts need more time to bake through. You might have to adjust your timing based on the toppings you choose. Heavier toppings can slow down cooking.
Do you preheat your oven? Preheating is essential to ensure even cooking. An oven that’s not fully heated can lead to unevenly cooked pizza. Always aim for a temperature between 475-500°F (245-260°C) for optimal results.
Signs Of A Perfectly Baked Pizza
Wondering how to tell when your pizza is done? Look for a golden-brown crust. A perfectly baked pizza will have a crispy edge and a lightly browned bottom. Lift the edge with a spatula to check the bottom.
The cheese should be melted and slightly bubbly. If it’s browning too quickly, consider adjusting the rack position or temperature. You can also look at the toppings; they should be cooked through but not burnt.
Sometimes, the aroma gives it away. A well-baked pizza emits a mouth-watering smell that fills the kitchen. Trust your senses. Keep an eye on it, but don’t open the oven door too often, as it can affect the temperature.
Every pizza baking session is a learning experience. Have you ever discovered a new way to perfect your pizza? Share your tips and insights in the comments!
Experimenting With Dough Thickness
Finding the ideal dough thickness enhances your pizza experience in the oven. Experiment to achieve a crispy or chewy crust. Adjust settings to suit your taste for a perfect slice every time.
Experimenting with dough thickness can dramatically change your homemade pizza experience. The beauty of making pizza at home is the ability to tailor each element to your liking. The crust, being the foundation, plays a pivotal role in determining the texture and flavor of your pizza. Whether you prefer a crispy base or a soft, chewy bite, understanding how dough thickness affects your pizza can elevate your next baking session.
Thin Vs. Thick Crust
When deciding between a thin or thick crust, consider the texture you enjoy most in a pizza. A thin crust offers a crispy, cracker-like base that allows toppings to shine. This is perfect if you love a delicate crunch. On the other hand, a thick crust provides a soft, bread-like foundation. This is ideal for those who enjoy a more substantial bite. Imagine biting into a fluffy interior with a slightly crispy exterior. To achieve a thin crust, roll your dough to a thickness of about 1/8 inch. For a thick crust, aim for about 1/2 inch. These measurements can be a game-changer in your pizza baking endeavors.
Adjusting Baking Settings
Once you’ve decided on dough thickness, it’s time to tweak your oven settings. For a thin crust, consider baking at a higher temperature, around 475°F (245°C), for a shorter time. This ensures a crispy finish without overcooking the toppings. A thicker crust requires a slightly lower temperature, about 425°F (220°C), and a longer baking time. This helps the dough cook through without burning the top. Have you ever noticed how changing these settings can affect the final outcome? Making small adjustments can make a significant difference in texture. Experiment by adjusting your oven racks too. Baking closer to the bottom can give your crust an extra crisp. Meanwhile, the middle rack is a safe bet for even cooking. Trying out these settings with different dough thicknesses can lead to delightful discoveries. So why not try both and see which you prefer? Your perfect pizza might be just a few tweaks away.
Managing Moisture Levels
Setting the oven to 475°F ensures a crispy crust while keeping toppings moist. Use a preheated pizza stone for even heat. Avoid opening the oven often to maintain consistent moisture levels.
Perfecting a homemade pizza involves more than just selecting the right toppings; it’s a dance of flavors and textures. One aspect often overlooked is managing moisture levels during baking. Achieving a crispy crust without sacrificing the juicy goodness of your toppings requires a few clever tricks. Let’s dive into how you can master this balancing act for the best pizza results.
Avoiding Soggy Crust
Nobody likes a pizza with a limp crust. A soggy base can ruin your pizza experience, but you can avoid this with a few simple adjustments. First, preheat your oven to its maximum temperature. A hot oven ensures a quick bake, which is crucial for a crispy crust. Try placing your pizza stone or baking sheet in the oven during preheating. This provides an immediate transfer of heat to the dough. Another tip is to use less sauce. While it’s tempting to load up on sauce, too much can lead to a wet crust. Spread a thin, even layer, leaving room for the crust to breathe.
Role Of Ventilation
Proper ventilation in your oven can be a game changer. When baking pizza, the steam needs somewhere to go. If it builds up inside the oven, it will settle back onto the pizza, leading to sogginess. Crack the oven door slightly during the last few minutes of baking. This allows steam to escape, resulting in a drier, crisper crust. If your oven has a convection setting, use it. The fan circulates air, which helps in reducing moisture inside the oven. It’s like giving your pizza a breath of fresh air. Have you ever noticed how pizzeria ovens have vents? That’s no coincidence. It’s all about controlling moisture to achieve that perfect pie. Managing moisture levels in your pizza-making process may seem like a small detail, but it makes all the difference. Try these tips, and you might just find yourself making pizza that rivals your favorite pizzeria.
Utilizing Convection Settings
Discovering the perfect setting for baking pizza in your oven can elevate your homemade pies to restaurant-quality delights. Using convection settings is a game-changer in achieving a perfectly crispy crust while maintaining a deliciously soft interior. As you explore this method, you’ll find that convection can enhance your pizza-making skills, allowing you to create mouth-watering results every time. Let’s dive into why convection might become your new go-to setting for pizza nights.
Benefits Of Convection
Convection ovens circulate hot air around your pizza, ensuring even cooking. This means no more soggy or unevenly baked pies. The consistent heat distribution helps the crust develop a golden-brown color while the toppings cook to perfection.
Another perk is the reduced cooking time. With convection, you can enjoy your pizza faster since the hot air speeds up the baking process. It’s perfect for those evenings when you want a quick, yet delicious, meal.
Convection settings also provide the flexibility to bake multiple pizzas at once. This is ideal for parties or family gatherings, where you need to cater to many hungry mouths without delay.
Adapting Recipes For Convection
To make the most of convection, adjust the temperature settings in your recipes. Generally, lowering the temperature by 25°F is recommended. This prevents over-baking while still achieving that scrumptious crust.
Keep an eye on cooking times as well. Your pizza may be ready sooner than expected, so start checking a few minutes earlier than the usual baking duration. This prevents the edges from becoming too crisp or the toppings from drying out.
Experiment with different crust thicknesses. Convection ovens excel at baking thin crusts quickly, but thicker crusts can also benefit from this setting. Try varying your recipes to see what works best for your taste.
Does convection sound like a setting you’ll try next pizza night? Exploring how this setting enhances flavors and textures can lead to delightful discoveries in your kitchen adventures.
Cooling And Serving Tips
Baking pizza at 475°F ensures a crispy crust and melted toppings. Place it on a middle rack for even cooking. Use a pizza stone or baking sheet for the best results. Let the pizza cool for a few minutes before slicing.
Enjoy the perfect blend of flavors and textures.
When you’ve achieved the perfect pizza in the oven, the next crucial step is cooling and serving it just right. This process can greatly impact the texture and flavor of your homemade masterpiece. Knowing the right cooling and serving tips can transform your pizza from good to unforgettable. Dive into these practical insights to elevate your pizza experience.
Resting Time For Best Texture
Allow your pizza to rest for 5-10 minutes after removing it from the oven. This short pause lets the cheese settle and toppings firm up, making every slice flavorful and easy to handle. Too eager to bite in immediately? Remember, patience pays off with improved texture. During this resting period, the crust stabilizes, avoiding a soggy base. Imagine the satisfaction of a crispy bite with every mouthful. Have you ever noticed how pizza can be tough to slice when too hot? That’s because it needs time to set. Embrace the wait for a more enjoyable eating experience.
Serving Suggestions For Crispness
Once your pizza has cooled slightly, think about how you serve it. Consider using a pizza cutter to achieve those perfect slices. The right slicing tool ensures crisp edges without tearing your toppings. Have you tried serving pizza on a wire rack? This technique keeps the crust crispy by allowing air circulation underneath. You avoid the dreaded soggy slice while impressing guests with your attention to detail. Serving pizza on plates straight from the oven may look appealing, but a cooling rack offers superior results for texture lovers. Do you have a favorite way to serve pizza that enhances its crispness? Experimenting with various methods can lead to unexpected but delightful discoveries. This could be the key to making your pizza nights even more memorable.
Frequently Asked Questions
What Oven Mode Is Best For Pizza?
Use the convection bake mode for the best pizza. It ensures even heat distribution and a crispy crust. Preheat the oven to 475°F for optimal results. Always place the pizza on a preheated pizza stone or baking sheet. This enhances the crust’s texture and flavor.
What Oven Setting To Make Pizza?
Set your oven to 475°F (245°C) for homemade pizza. Use the bake setting for a crispy crust. Preheat the oven fully before placing the pizza inside. If using a pizza stone, preheat it as well to enhance the crust texture.
Ensure even baking by placing the pizza on the center rack.
Should I Bake Pizza At 400 Or 450?
Bake pizza at 450°F for a crispy crust and perfectly melted cheese. Baking at 400°F results in a softer crust. Adjust time based on toppings and thickness. Use a preheated oven for best results. Enjoy your homemade pizza with desired toppings and textures.
What Setting Should I Use For A Pizza Oven?
Set your pizza oven to 450-500°F (232-260°C) for best results. Preheat for at least 30 minutes. Use a pizza stone or steel for an even bake.
Conclusion
Creating the perfect pizza at home is easy with the right oven settings. Use a preheated oven for even cooking. A temperature of 475°F (245°C) works well for crispy crusts. Place your pizza on the middle rack for balanced heat.
Keep an eye on it to avoid burning. Check after 8-12 minutes, depending on thickness. Experiment with settings to find your favorite taste. Remember, practice makes perfect. Enjoy your homemade pizza with family and friends. Happy baking!