Affiliate Disclosure: This post may contain affiliate links. If you purchase through links on our site, we may earn an affiliate commission at no extra cost to you.
Imagine the enticing aroma of freshly baked pizza wafting through your backyard. There’s something magical about the crispy, slightly charred crust only a wood-fired oven can create.
If you’re passionate about pizza and want to master the art of making the perfect dough, you’ve come to the right place. This isn’t just any pizza dough recipe; it’s your ticket to transforming simple ingredients into a mouthwatering masterpiece.
Whether you’re hosting a cozy family dinner or a lively pizza party, the secret to unforgettable pizza lies in the dough. You deserve to experience the delight of biting into a crust that’s light, airy, and full of flavor. Are you ready to elevate your pizza game and impress your taste buds? Keep reading, because this recipe will change the way you think about homemade pizza forever.
Choosing The Right Flour
Choosing the right flour is a crucial step in crafting the perfect pizza dough for your wood-fired oven. The type of flour you use can dramatically affect the texture, flavor, and rise of your dough. Understanding the differences between flour types can elevate your homemade pizza to a restaurant-quality level.
Type Of Flour Matters
Did you know that the protein content in flour can change the texture of your dough? High-protein flours like bread flour create a chewy crust, perfect for holding up to the high heat of a wood-fired oven. If you prefer a more tender crust, you might want to try all-purpose flour.
Consider Using ’00’ Flour
’00’ flour is often recommended for pizza enthusiasts. It’s finely ground and has a low protein content. This combination leads to a thin, crispy crust that many pizza lovers adore. It’s the secret weapon behind many traditional Italian pizzas.
Experiment With Whole Wheat Flour
If you’re feeling adventurous, whole wheat flour can add a nutty flavor and extra nutrients to your dough. It might require a bit more water due to its density. Consider mixing it with another flour to balance texture and taste.
Balance Is Key
Combining different types of flour can offer the best of both worlds. You might mix bread flour with ’00’ flour to get a crust that’s both chewy and crispy. This kind of experimentation can lead to surprising and delightful results.
Have you ever wondered how different flours can completely change your pizza experience? It’s fascinating how a simple switch can turn a good pizza into a great one. What’s your favorite type of flour for pizza dough?
Next time you’re preparing for a pizza night, consider trying a new flour to see how it transforms your dough. You’ll be amazed at how the right choice can make your pizza unforgettable.
Essential Ingredients
Crafting the perfect pizza dough for a wood-fired oven requires just a few essential ingredients. Flour, water, yeast, salt, and olive oil create a delicious, crispy crust. Achieving the right texture makes every bite delightful.
Crafting the perfect pizza dough for a wood-fired oven is all about getting the right mix of essential ingredients. Each element plays a crucial role in achieving that crispy, chewy texture we all love. Let’s delve into the key components that will elevate your homemade pizza to pizzeria standards.
Yeast Options
Yeast is the powerhouse of your pizza dough, responsible for creating that delightful rise and airy texture. You can choose between active dry yeast and instant yeast. Active dry yeast requires activation in warm water, while instant yeast can be mixed directly into the flour. Both types work well, but instant yeast offers a quicker rise, perfect for those spontaneous pizza cravings. Have you ever tried experimenting with sourdough starter as your yeast source? It adds a unique tangy flavor and enhances the dough’s complexity.
Salt For Flavor
Salt is more than just a seasoning; it’s a fundamental ingredient that enhances the dough’s flavor and controls the yeast activity. The right amount can bring out the natural flavors of the flour and create a well-balanced taste. Be cautious with the quantity; too little and your dough will taste bland, too much and it can hinder the yeast. A good rule of thumb is to use about 1.5% of the flour weight in salt. Remember the time you skimped on salt and your pizza was disappointing? Don’t let that happen again.
Water Temperature
The temperature of the water you use is crucial for activating the yeast and starting the fermentation process. Warm water, around 100°F (38°C), is ideal to wake the yeast up without killing it. Cold water will slow down the process, while hot water can destroy the yeast. Have you ever felt impatient and used hot water, only to end up with a dense dough? It’s a common mistake but easily avoided. Use a thermometer if necessary to ensure your water is just right. The satisfaction of watching your dough rise perfectly is worth the extra effort. By understanding and mastering these essential ingredients, you can create a pizza dough that rivals your favorite wood-fired oven pizzeria. What’s your secret ingredient or tip for making the perfect dough?
Mixing Techniques
Creating the perfect pizza dough for a wood-fired oven involves mastering mixing techniques. These techniques influence the dough’s texture and flavor. Whether you prefer manual mixing or using a stand mixer, each method offers unique benefits.
Manual Mixing
Manual mixing gives you control over the dough texture. Start with flour in a large bowl. Add salt and yeast. Gradually pour in water while stirring with a wooden spoon. This helps distribute ingredients evenly. As the dough starts forming, use your hands. Knead the dough inside the bowl. Feel the consistency change. It should become smooth and elastic. This process requires patience. It connects you to the dough directly. Perfect for those who enjoy hands-on baking.
Using A Stand Mixer
A stand mixer speeds up the mixing process. Attach the dough hook to your mixer. Place flour, salt, and yeast in the mixing bowl. Turn the mixer to low speed. Slowly add water. Watch as the dough combines effortlessly. Let the mixer knead for about 5 minutes. The dough will become smooth and elastic. This method saves time. It’s ideal for busy bakers. Ensures consistent texture without manual effort.
Kneading The Dough
Kneading the dough is a vital step in making pizza. It develops gluten, giving the crust its chewy texture. Proper kneading ensures even cooking in a wood-fired oven. Understanding the technique improves the final result.
Hand Kneading Steps
Start by placing the dough on a clean surface. Use your palms to push the dough away from you. Fold it back towards you and rotate. Repeat this motion for about 10 minutes. The dough should become smooth and elastic. If sticky, sprinkle a little flour. Avoid adding too much flour. This could make the dough tough.
Machine Kneading Tips
Using a stand mixer can save time. Attach the dough hook for best results. Start mixing on a low speed. Increase the speed gradually. Knead for about 5 minutes. Check the dough’s texture. It should feel soft and stretchy. If too sticky, add a bit of flour. Ensure not to over-knead. This can make the dough too dense.
Fermentation Process
Understanding the fermentation process is key to perfect pizza dough. Fermentation impacts flavor, texture, and digestibility of the dough. This process allows yeast to break down sugars, creating CO2 and alcohol. These gases create bubbles, which give the dough its airy texture. Let’s dive into the steps that define this crucial phase.
Room Temperature Rise
Allowing dough to rise at room temperature creates complex flavors. It lets yeast work actively, producing more gas and flavor compounds. This method suits those who want quicker results. Place your dough in a warm spot for a few hours. Check its rise periodically. The dough should double in size. This method gives a soft and pliable texture. Perfect for a light, airy crust.
Cold Fermentation Benefits
Cold fermentation offers distinct advantages. Slowing down the yeast activity enhances flavor. The dough sits in the refrigerator for 24-48 hours. This slow rise gives a richer taste and chewier crust. The method creates a unique depth of flavor. It also makes the dough more digestible. Remember to remove it from the fridge before use. Allow it to reach room temperature before shaping.
Shaping The Dough
Crafting the perfect pizza dough for a wood-fired oven requires patience and precision. The dough’s texture should be soft yet firm, allowing it to rise beautifully. Achieve a crispy crust that holds toppings well by focusing on quality ingredients and proper kneading techniques.
Shaping the dough is a crucial step in creating the perfect pizza for your wood-fired oven. It’s where your pizza starts to take its true form, and how you shape it can affect the final texture and taste. Imagine the satisfaction of pulling a beautifully formed pizza from the oven, knowing you shaped it with your own hands. Every twist and turn of the dough is part of the artistry of pizza-making. So, let’s dive into the art of shaping your pizza dough with finesse and skill.
Forming Dough Balls
Creating dough balls is where your pizza truly begins its journey. Start by dividing your dough into equal portions; this ensures that each pizza cooks evenly. Roll each portion gently into a ball. The key is to tuck the edges underneath, creating a smooth surface on top. This process builds tension in the dough, crucial for a good rise and a crisp crust. Place your dough balls on a lightly floured surface. Cover them with a damp cloth and let them rest. This resting period allows the gluten to relax, making the dough easier to stretch. Have you ever noticed how relaxed dough is easier to handle?
Rolling Vs. Stretching
The debate between rolling and stretching is an ongoing one among pizza enthusiasts. Rolling with a pin can make the process quicker, but it may also compress the air out of your dough. This could result in a denser crust, which might not be what you want for a light, airy bite. Stretching, on the other hand, preserves those precious air pockets. Start by pressing your fingertips into the center of the dough, gently working towards the edges. Use your knuckles to stretch the dough further, allowing gravity to assist you. Think about the satisfaction of seeing your dough expand as you stretch it. Each gentle tug gets you closer to that perfect, wood-fired crust. Remember, practice makes perfect, and each pizza is a new opportunity to improve your technique. Which method do you prefer, rolling or stretching? Your choice can make all the difference in your pizza’s final outcome.
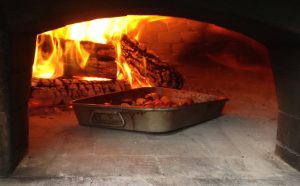
Preparing The Wood Fired Oven
Preparing the wood fired oven is crucial for the perfect pizza dough. The right preparation ensures your pizza cooks evenly and develops a crispy crust. Let’s explore the essentials for getting your wood fired oven ready.
Ideal Temperature
The ideal temperature for baking pizza in a wood fired oven is around 750°F (400°C). This temperature crisps the crust while keeping the inside soft. Use an infrared thermometer to check the heat. Allow the oven to preheat for at least 60 minutes. This ensures the temperature is even throughout.
Wood Selection
Choosing the right wood affects the flavor and heat of your pizza. Hardwoods like oak, maple, or ash are best. They burn hotter and longer than softwoods. Avoid treated or painted wood as they can release harmful chemicals. Use dry, seasoned wood to maintain steady temperatures. Arrange the wood in a crisscross pattern for better air circulation. Proper wood selection ensures a clean burn and enhances the pizza’s taste.
Baking The Pizza
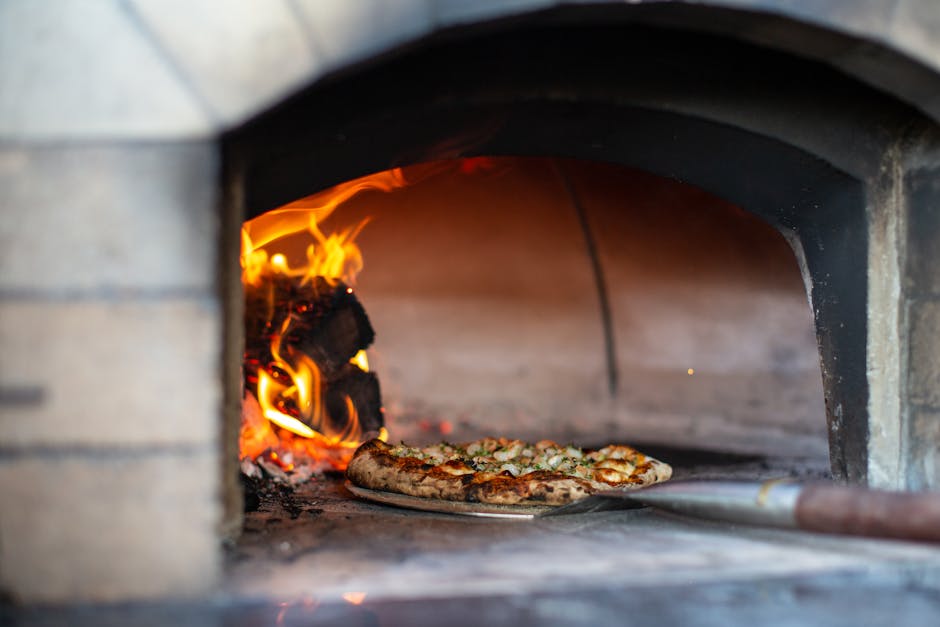
There’s something magical about baking pizza in a wood-fired oven. The intense heat creates a crispy crust with a smoky flavor. This method brings out the best in your homemade dough. Follow these steps for perfect results.
Placing On The Stone
Start by preparing your pizza stone. Ensure it’s hot and ready for action. Dust your peel with flour or cornmeal. This prevents sticking and helps the dough slide easily. Place the rolled-out dough on the peel carefully. Add your toppings swiftly, so the dough doesn’t stick.
Monitoring Bake Time
Once your pizza is on the stone, watch closely. Wood-fired ovens heat quickly. Keep an eye on the pizza’s crust. It should be golden brown and crispy. Baking time varies but usually takes around 5-7 minutes. Use a timer for accuracy and consistency.
Troubleshooting Common Issues
Making pizza dough for a wood-fired oven can be tricky. Many encounter common issues that can affect the final result. This section addresses these problems, offering practical solutions to enhance your pizza-making experience. Whether your dough is sticky or your crust is too hard, there’s a fix.
Dough Too Sticky
A sticky dough can be frustrating. It makes handling difficult and affects the crust’s texture. This issue often arises from too much moisture. Measure your ingredients accurately. Use a kitchen scale for precision. If the dough feels sticky, add flour gradually. Work it in until you reach the desired consistency. Avoid adding too much at once. This can make the dough dry and tough.
Temperature matters. Dough should rest in a warm, not hot, area. Excess heat can increase stickiness. Use room temperature water for mixing. Cold water slows yeast activity, leading to sticky dough. Knead thoroughly. Proper kneading develops gluten, reducing stickiness. Aim for a smooth, elastic texture.
Crust Too Hard
A hard crust can ruin a pizza. It makes biting difficult and less enjoyable. The issue often stems from overcooking. Monitor your oven temperature closely. Wood-fired ovens heat quickly. Use a thermometer to ensure accurate readings. Keep the oven around 450°F for ideal results.
Another cause is dough thickness. Roll the dough thinly for a crisp crust. Thick dough takes longer to cook, hardening the crust. Use a rolling pin for even thickness. Allow the dough to rise adequately. Insufficient rising time leads to dense, hard crusts. Give it at least an hour to rise. A well-risen dough results in a light, airy crust.
Moisture balance is crucial. Brush the crust with olive oil before baking. It helps retain moisture and adds flavor. Experiment with cooking times. Shorter baking times can result in a softer crust. Check the pizza frequently to avoid overcooking.
Tips For Perfect Dough
Creating the perfect pizza dough for a wood-fired oven requires more than just a recipe. Understanding the nuances of dough preparation can transform your pizza into a culinary delight. Below, we explore essential tips to refine your dough-making skills.
Adjusting Hydration
Hydration impacts dough texture and elasticity. High hydration levels make dough softer and more pliable. It’s ideal for achieving the bubbly crust typical of wood-fired pizzas. Start with a balance between water and flour. Gradually increase water until the dough feels right. Too much water makes it sticky and hard to handle. Too little results in a dense crust. Aim for a hydration level around 65% to 70%. This ensures a crispy yet chewy texture.
Improving Texture
Texture defines the bite and chew of your pizza crust. Kneading plays a critical role. It develops gluten, giving dough its structure. Knead until smooth and elastic. Use the windowpane test to check gluten development. Stretch a small piece of dough until thin. If it doesn’t tear, it’s ready. Resting the dough is equally important. Allow it to rise for at least two hours. This enhances flavor and texture.
Frequently Asked Questions
What Is The Secret To Good Pizza Dough?
The secret to good pizza dough lies in high-quality flour, proper hydration, and a balanced yeast fermentation. Knead dough until smooth, then let it rise slowly for best flavor. Use a hot oven for a crispy crust. Experiment with ingredients to find your perfect taste and texture.
Can You Use Regular Pizza Dough In A Wood-fired Oven?
Yes, you can use regular pizza dough in a wood-fired oven. Ensure it’s well-hydrated for high heat. Adjust cooking time to prevent burning. Wood-fired ovens enhance the flavor and texture of the dough. Experiment with toppings for the best results.
Enjoy the authentic taste of wood-fired pizza!
What Is The 55 Rule For Pizza?
The 55 rule for pizza involves baking at 550°F for 5 minutes. This technique ensures quick cooking while retaining flavor. High temperature helps achieve a crispy crust and perfectly melted cheese. Ideal for thin crust pizzas, it offers a balance between speed and quality.
Is Wood Fired Pizza Dough Different?
Wood fired pizza dough often uses higher hydration levels and specific flour types. This creates a crisp, chewy texture. It develops unique flavors due to the high-heat baking process. Traditional techniques enhance its taste and texture, making it distinct from regular pizza dough.
Conclusion
Crafting the perfect pizza dough is a rewarding experience. This recipe suits any wood-fired oven. Enjoy the crispy crust and soft interior. Your family and friends will love this pizza. Try adding your favorite toppings for variety. Practice makes perfect, so bake often.
Share your pizza creations with loved ones. Remember, good ingredients make a big difference. Keep experimenting and have fun. Your wood-fired pizza nights just got better. Happy baking!